
What is a herb garden without dill! This annual herb brings flavor and nutrition to many varieties of food such as dips, sauces, potatoes, fish, roasted vegetables, and of course, pickles! If you are like us, without a garden, you can still grow it at home!
Imagine growing this herb as microgreens indoors without the need for a green thumb, lots of space, and expensive equipment. And you can harvest and enjoy it within three weeks! Yes, it’s possible, and it’s easy too!
In this article, we’ll walk through the entire process for growing Dill microgreens – from sowing to harvesting – so you can enjoy this healthy herb from tray to table!
What are Dill Microgreens?
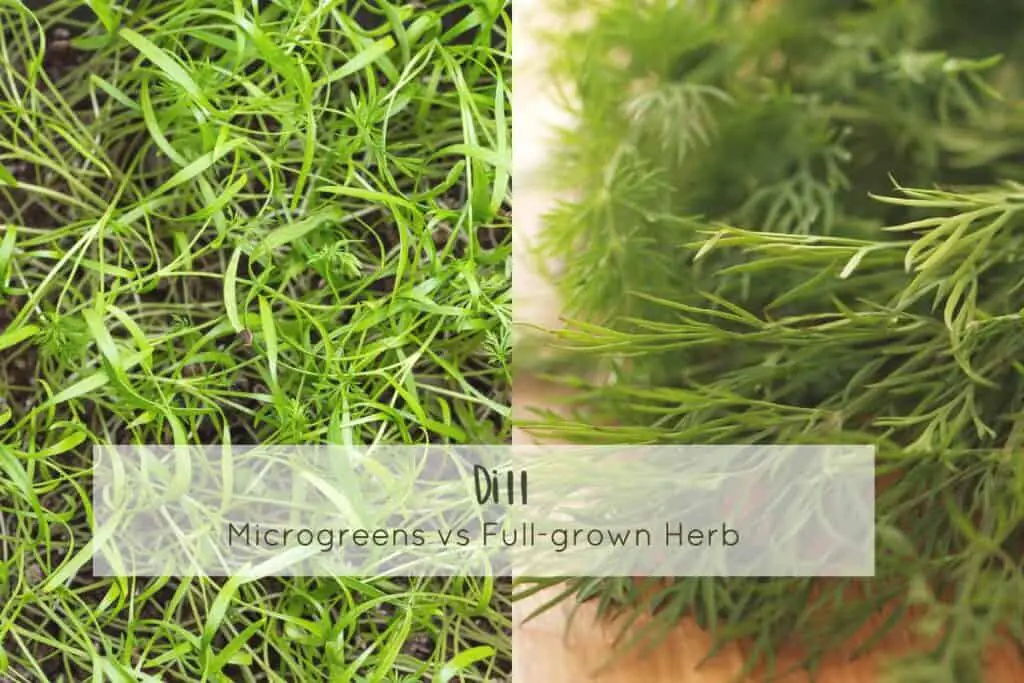
Most of us probably know dill as an annual herb growing in a garden or even indoors in pots. But fewer know that this herb can be grown as microgreens! They’ll get a different look but with the same great taste.
Dill has been around us for ages, and we use it as an aromatic flavor to pickles, potatoes, salmon, yogurt salsas, and many more dishes! It has its origin in Europe and Asia but has since become an important part of foods elsewhere in the world.
Dill belongs to the family Apiaceae, the same as carrots, and if you look at the leaves of the two, you will see the similarity. Both have feathery-like green leaves.
Apart from the taste and aesthetics, there are many benefits to grow dill as microgreens. Not only will you be able to enjoy it much faster than growing them in your herb garden, but you will also harvest a highly nutritious green that boosts wellness!
Dill microgreens grow faster than the full-grown herb but slower than many other microgreen varieties. However, it’s well worth the wait! After around three weeks, you will have an exquisite, tall, and feather-like microgreen ready to be enjoyed.
Some Dill microgreens facts:
- Botanical name: Anethum graveolens
- Growing season: Anytime! You can grow microgreens indoors all year round.
- Growing conditions: Indoors; 20 degrees and 50% humidity
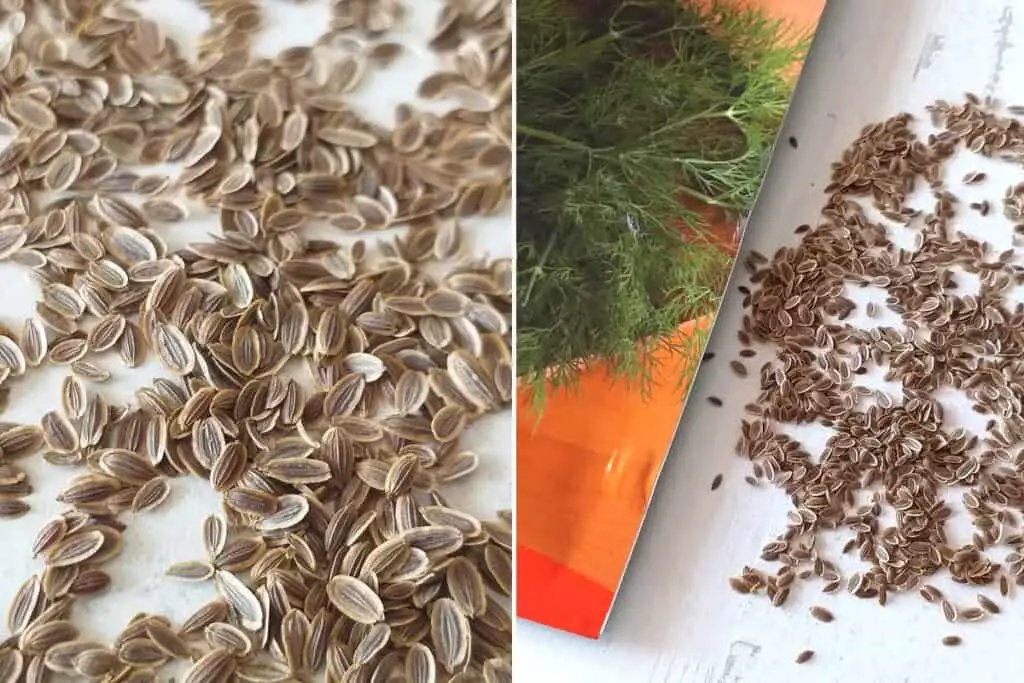
- Seeds: Dill seeds are small and flat. If you have a garden and growing as a full-grown herb, you can harvest the seeds and replant them as microgreens.
- Plant form and size: Dill microgreens are mature when they have developed spikey and feathery green leaves.
- Estimated growth time: 16-20 days
INTERESTING FACT
Did you know that there are at least 13 varieties of dill, and Bouquet is one of the most common types? You will recognize this variety from its green tall stems and yellow flowers. This sort is well-known for pickling cucumbers. Bouquet Dill seeds are grown as microgreens, and they will develop pinkish-white stems and green leaves!
Othe varieties of Dill are Dakota, Mammoth, Dukat, Long Island, and Fernleaf.
How Does Dill Microgreens Taste?
Dill microgreens have an aromatic taste, with a hint of lemon and anise. It’s often said to be grassy, but we would add that it has a lightly sweet, fresh, and reviving taste. They have the same intense flavor as the mature plant.
What Conditions do Dill Microgreens Need to Grow?
Dill microgreens grow well indoors, with a temperature around 20 degrees and 40-60% humidity. Microgreens are sensitive to cold, humidity, and heat, so you must have the right conditions. If the room you grow in is very humid, you may face mold in your crops, and if it’s too hot, your greens can dry out and wilt.
The humidity level in the average home is around 40-50%. It’s the level where most of us feel comfortable. If you are not sure of the temperature and humidity level, it’s worth investing in a hygrometer.
Here you can read our complete guide on How to Control Humidity and Temperature in Microgreens.
How to Grow Dill Microgreens (Step-by-Step Guide)
Dill microgreens are easy to grow at home. Most microgreens are ready for harvest after two weeks, but Dill has a longer growth period. You typically harvest after 16 and up to 20 days. If you compare this with the full-grown plant, which takes around six weeks to reach maturity, then it’s still a fast-growing green!
Let us walk you through the process of growing Dill microgreens.
| Growing timeline (estimated) | |
|---|---|
| Presoak | No |
| Preferred medium | Soil or coconut coir |
| Avg. seep weight (10/20 tray) | 1 oz / 15 gram |
| Germination period (blackout) | Day 1-6 |
| Growth time (sunlight) | Day 7-15 |
| Harvest | Day 16-20 |
Equipment
Start by getting your equipment ready. To grow microgreens you don’t need specific or expensive things.
This is what you need:
- Tray or another container – Ideally use a “No hole bottom tray” + “tray with drainage holes”. If you don’t have trays, you can use other containers. Select one that is shallow, not more than 2 inches high.
- Growing medium – Potting soil or soilless medium such as coconut coir.
- Spray bottle – Ideally use one that can give a light mist.
- Dill seeds – You can use regular dill seeds. We don’t have a garden and therefore buying the seeds from the garden shop. They are not necessarily labeled as microgreens, and that’s fine.
TIP: Dill seeds can last for many years if you store them in a dark and cool place. Before you plant them as microgreens, you can do a viability test. Put some of the seeds in a moist paper towel, fold it and place it in a Ziploc bag or similar and wait for a few days. If you see that the seeds germinate, then they are good for microgreens!
Step 1 – Preparation & Planting
The first thing to do is to select your container. Select a shallow container to grow your Dill microgreens. We recommend that you use one with drainage holes so that you can do bottom-watering.
It’s common to use specific microgreens trays, but if you don’t own one, you can use other types of containers. For some inspiration, check out our article: 9 Alternative Containers for Growing Microgreens.
For this guide, we will show you how to use aluminum pie tins.
- Make drainage holes (optional) – Start by making drainage holes in the container if it doesn’t have any. Place it on top of another one. Your bottom container will catch any excess water, and later in the growth process, you will use it for watering.
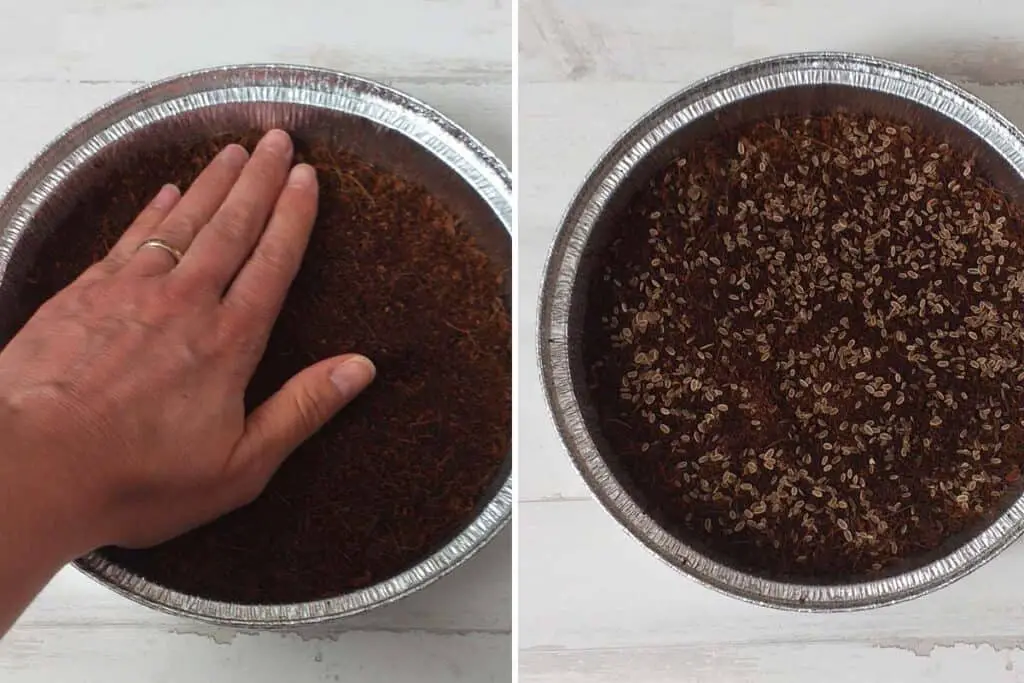
- Fill up the container with a growing medium – Dill is best grown in potting soil or coconut coir. Take your clean container and fill it up with the medium. Flatten it out with your hands to create an even surface.
- Plant the seeds – Spread your dill seeds evenly across your container/tray. If you are using a 10/20 tray, you can sprinkle around 15 grams. That will give you good density with nice and solid growth. Avoid using too many seeds so they end up on top of each other. Before you plant the seeds, smell them! You will sense the dill aroma even before they start to grow!
- Cover the seeds – Dill microgreens seeds benefit from being covered with a thin layer of soil or coconut coir (depending on the medium you have chosen to work with). Don’t put too much medium on top but just enough to give them a good cover. This method will help to support the germination process.
- Give water – Once you have planted your seeds, it is time to give them a light mist of water. Be gentle as you give water, so you don’t wash away any soil or seeds. The medium should be moist and not wet or oversaturated.
Step 2 – Germination Period (blackout)
Once you have prepared the container, it’s time for the seeds to germinate. To support this process, you will put them in a dark place (to imitate the natural growing process).
- Start blackout period – Place your tray with dill seeds in the dark for six days. Many microgreens varieties benefit from placing a tray on top of the planted seeds, pressing them downwards. As you have put some extra growing medium over your seeds, this will act as the weight and support the germination. You don’t need anything else. If you don’t have a dark place to put the tray, you can cover it by placing another empty tray on top or covering it with aluminum foil or a paper towel.
- Give water – Continue to give water during the blackout period. The soil should always be moist but not wet or oversaturated. Give a gentle mist of water twice a day; once in the morning and once in the evening. After each turn, be sure to put the container back in the dark or cover it.
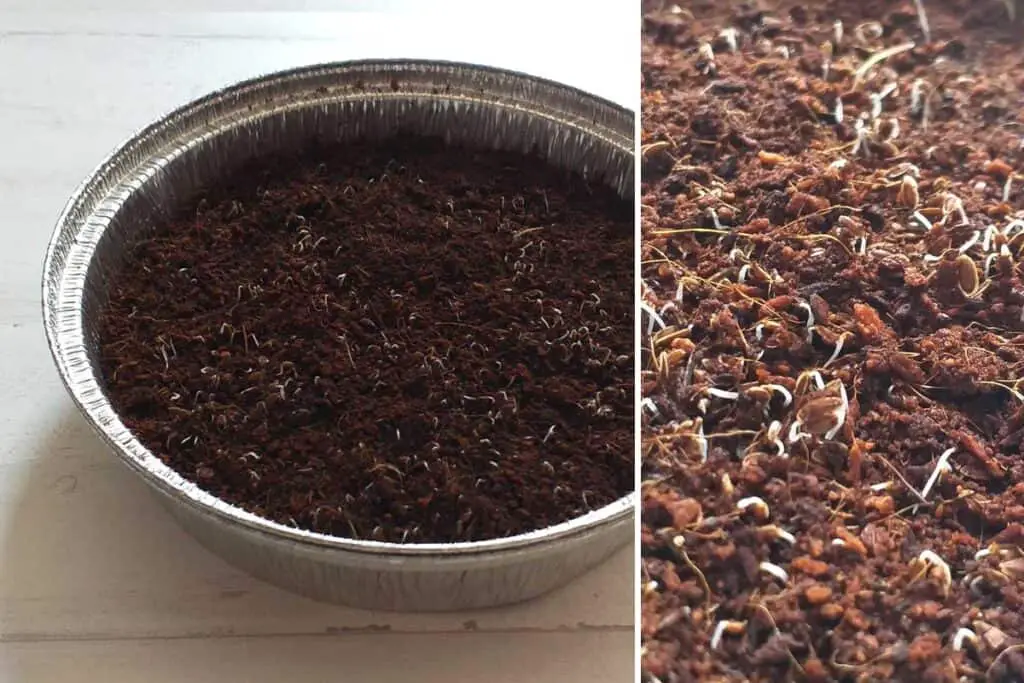
After roughly six days, the seeds will germinate, and they will grow thin with long stems. Be patient during these first days, as you may feel that nothing happen. However, they need this time to do its magic.
Step 3 – Sunlight Period
Once the seeds have germinated, it’s time to bring them out from the blackout and give them light. In terms of lighting schedule, microgreens should get around 12-15 hours of light a day and around 9-12 hours of darkness.
You can use natural light if you don’t have a setup with grow lights. Just be sure to put your tray near a well-lit window and give them at least 6-8 hours of light. This is a great reference if you are only able to provide natural sunlight.
- Place container in a sunny spot – Remove the cover if you had one and put your container in a window sill, another place where it can get natural sunlight or under your grow light.
- Give water – When you have exposed the microgreens to light, continue watering twice a day. Enough to keep them moist but again, not to oversoak them. If the growing medium is still moist in the evening, you can do with once a day. If you are using a double layer of containers or trays, you can water them from the bottom. It’s called “bottom-watering”. The roots will grow downwards through the mesh/holes. By pouring water into the bottom tray, you feed the roots directly. This method is great for avoiding over-watering that in turn can lead to wilting and growing mold.
If you are using a single tray or another type of container, be careful not to give too much water so that your crop may fall over. Dill microgreens are very thin and feathery, so continue watering with a light mist. When they are growing tighter, you can give some additional water from the side of the container.
TIP: Dill microgreens can be sensitive to too damp soil/coconut coir, and that can cause the leaves to turn yellow. To help recovery, you can hold off your watering and let the medium dry up.
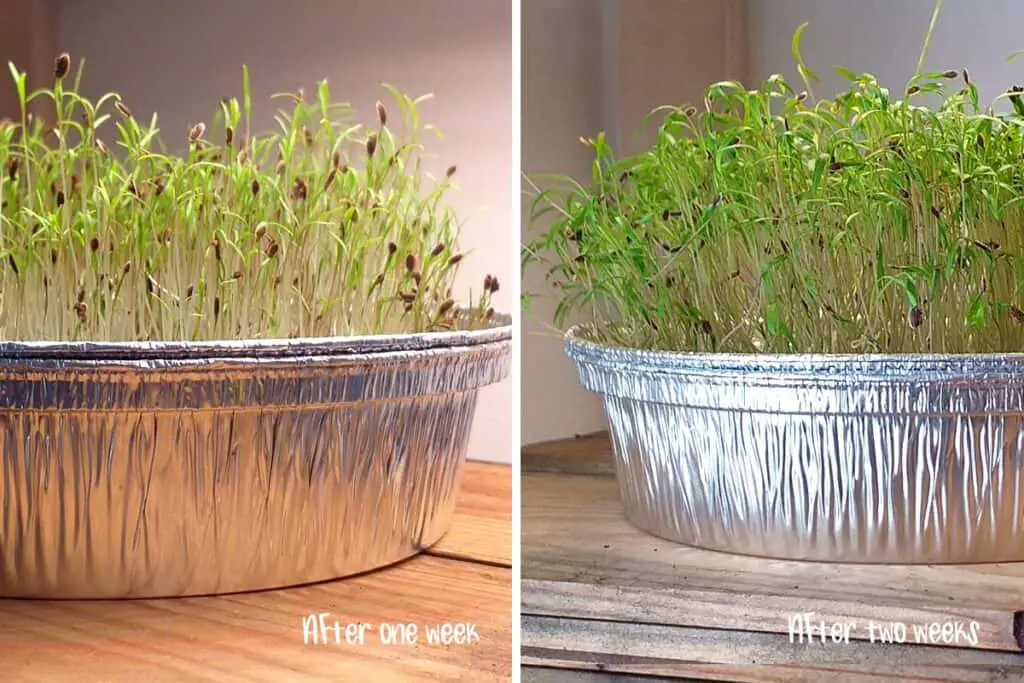
As the dill seeds start to grow into microgreens, you will see that the first leaves appearing will not look like the typical dill plant. They are spikey compared to the feathery look of the mature herb. However, the leaf shapes will change as the microgreens continue to grow.
Step 4 – Harvest
From around day 16 your dill microgreens are ready for harvest. As the leaves are so thin you can decide if you want to harvest and have them shorter or wait for another couple of days to get them more developed.
Cut the microgreens low, just above soil level. Once you have harvested, you dispose of the soil and roots. You cannot regrow new dill microgreens from the remains.
Are Dill Microgreens Healthy to Eat?
Microgreens are known for their many health benefits, and dill is no exception. They bring not only good taste, but they are filled with nutrition.
What characterizes dill and what makes it popular to grow at home is that they are low in calories but high in vitamins. They also have a high content of antioxidants.
According to the food and nutrition database from the United States Department of Agriculture, dill includes several essential vitamins and minerals, including vitamin A, B-6, C, folate, manganese, and potassium.
How Can You Use Dill Microgreens?
Use your dill microgreens the same way as you would use full-grown ones. This versatile herb is adding taste to many dishes.

We use them in the most simple way; just sprinkling the microgreens over fresh potatoes, fish, soups, and salads. But you can also use it as a main ingredient and create some amazing dishes.
Some delicious recipes that may inspire you:
- Dill Potato salad
- Lemon Dill Pesto
- Fresh cucumber salad with Dill
- Garlic Dill Pickles
- Creamy Dill sauce
How to Store Dill Microgreens?
Dill microgreens will stay fresh for a few days, and then you will notice that the taste will slowly fade away. The small greens will also start to lose their original shape and maybe even dry up if you have kept them at room temperature or gotten soggy if they have been in the fridge.
To make them last longer, start by placing them completely dry in a sealed container and put them in the fridge. The key here is DRY.
A tip is to avoid watering a day before harvest to ensure they are completely dry. If you grow with very high density, this can also cause the microgreens to keep high humidity as there won’t be any airflow between the stems.
READ ALSO: Best Ways to Store Microgreens after Harvest
Another alternative for storing microgreens is to freeze them. Just remember that they will not have the same texture and taste as if you eat them fresh.
Let’s Wrap it up
Since we started growing dill microgreens, this has been a recurrent herb on our shelf. They take longer than many other varieties to grow, but it’s still far quicker than growing the full-grown herb. It’s an easy microgreen to grow and versatile to use. This combination is what most growers want.
What we love about microgreens is that we can grow them all year round. No season is better than another. What’s important when you grow indoors is to keep a good climate and growing conditions. Humidity, lack of airflow, and high/low temperatures can impact your microgreens by growing mold, wilting, and/or they start to smell bad.
We hope you have found this guide for growing dill microgreens helpful, and we would love to hear your feedback. Send us a comment below and share your experiences!