
We love to explore alternative containers for growing microgreens. If you are new to growing microgreens and want to try it out, or simply enjoy fun ways to grow, then we have some ideas lined up for you!
Growing microgreens is excellent when you lack garden space. You don’t have to invest in specific equipment if you are growing for home use only. If you are a commercial farmer or want to grow larger crops, we recommend using trays specifically designed for microgreens. But if you are in it for the fun, and want to try it out, this article is for you!
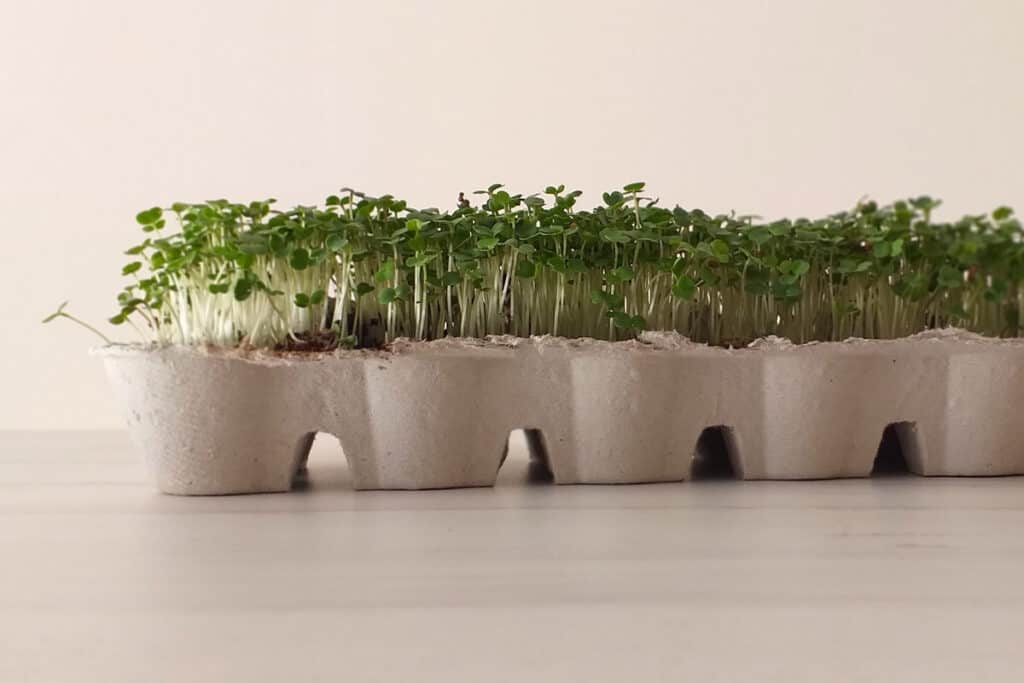
Look around your home, and you will find things that will make great containers for growing microgreens! You can use (almost) any type, but some are more user-friendly and attractive than others.
You may be surprised at what you can upcycle and reuse. Using what you already have at hand is a great way to get started with growing microgreens. It can be a glass jar, milk cartoon, an egg carton, a plastic food container, a terracotta pot, or even a plant saucer. So, repurpose everyday household supplies and try different, fun, and creative ways to grow microgreens. You may be surprised what you can use.
We have tested and succeeded in growing a variety of microgreens in 9 different types of containers! Those we are going to look at are commonly used in our daily lives, so there is no need to go on a shopping spree. Let’s reveal what they are…
So, what makes an ideal container?
Before we go down the list, let us first look at what makes an ideal container. There are a few characteristics that you should consider before you plant your microgreens. These are not a must, but they will make the entire planting and growth process easier.
- Ideally, the container should be shallow, around 2 inches high. When you are growing microgreens, you only need to use a thin layer of soil (or other soilless media), as they don’t grow tall roots.
- It’s beneficial if the container has drainage holes. When the seeds have germinated and started growing roots, a common method is to water the microgreens from a bottom tray. This method is called bottom-up watering. You can recreate this by using a container that already has drainage holes or by creating holes in a container yourself. We will show you some examples further down this article!
- The container needs to be toxic-free! It’s actually the only must in this list. Don’t use something that has held toxic material as there may still be strains left even after cleaning. We are talking about growing food, so we cannot take any risks!
9 Alternative Containers You Can Grow Microgreens In
The containers we have listed are all commonly used in households. We have tried and succeeded to grow in all of them. Let us share what makes them great and anything you should consider before you give it a go.
1) Milk & Juice carton
Did you know that there are more than 5 billion milk cartons produced every year in the US! Now that is a lot of containers! So, instead of putting it directly into recycling, why not use it as a tray for growing microgreens.

Milk and juice cartons make excellent containers for growing microgreens. They are sanitized and sterilized during the production process. They also have a layer between the beverage and the paper that is waterproof. So when you are going to water your microgreens, you don’t have to worry about any leakage.
Most cartons are also perfect in size (being rectangular) if you want to place them on a window mill.
You will not get a large batch from using these containers, but you can grow many different types of microgreens instead. Try out a couple of different seeds and find out what your favorites are!
How to use it
Using a milk or juice container is an easy and fun project! You don’t need more than the container itself, a pair of scissors, a growing medium, and the seeds of your choice.
Remember to wash it thoroughly to remove any leftover milk or juice. Cut the cardboard on the long side to make a top and a bottom. Fill up one part with the growing medium and seeds, and use the other half as cover during the blackout phase (germination phase).
TIP: Make some small holes in the milk carton for drainage. Place the container inside another carton box and use this one as a bottom tray. You can then water from beneath as the microgreens have developed roots!
Growing in a milk or juice container works great with different types of growing mediums. You can use potting soil, coconut coir, organic cotton, or even a hydroponic growing mat.
2) Egg Carton
Growing microgreens in an egg carton is another fun and environmentally friendly option (of course, if you are using those made out of paper or cardboard)! Next time you have emptied your egg carton, don’t let it go to waste but make it have a second purpose!
Cardboard egg cartons are often used to start seedlings. A seed is planted in each of the holes, and when it has germinated it is replanted in a garden or pot and it will grow to its full size. When planting microgreens, we will leave them in the egg carton to grow past the germination stage to get beautiful and nourishing microgreens.
Egg cartons are great to use because they are eco-friendly. They are usually made of recycled paper and are biodegradable. When you have finished growing and harvested your microgreens, you can put the egg cartons in your compost bin.
You have to remember that egg cartons made out of cardboard doesn’t retain water very well. When you water your seeds and soil, the carton may leak and get the surface wet. To prevent this and to catch up with any excess water, you can place your egg carton on a plate or any other flat container you may have.
How to use it
Cut the lid from an egg carton with scissors or a sharp knife. You can use the top part as a blackout dome during germination.
Fill up the bottom part with soil or coconut coir and evenly spread the seeds. You have to use a loose medium and equally spread it across the carton.
Water the seeds by giving them a light mist with a spray bottle. Don’t use the bottom-watering technique when growing in egg cartons as the paper is porous, and the water can pass through the paper. Be gentle when you are watering, and if you do find that the carton is starting to get wet at the bottom, place it on another carton, a cloth, or a flat plate to avoid getting water on the surface where you have placed it.
Once the seeds have germinated, introduce them to the light and magic will happen!
3) Plant saucers
If you love gardening and plants, you may have some extra plant saucers stored. Plant saucers are shallow dishes used to catch excess water that drains from a pot. Some saucers are deep enough to grow microgreens.

These containers are great to use because they are sturdy. They are often made out of firm plastic or ceramic, and you can use them repeatedly.
You can choose to grow them with or without drainage holes. We have drilled holes in a plastic plant saucer but found it too much work for a ceramic one. If you don´t want to drill holes, just keep an extra eye on your soil to ensure you don’t oversaturate it. Giving too much water is one of the more common reasons why microgreens grow mold.
How to use it
Remember to clean the saucer thoroughly before using it for microgreens. If you have used it for other plants, there may be some debris left that can harm your growth and cause fungus/mold or other diseases.
Fill up the saucer about 3/4 with soil or coconut coir (or a mix of the two), and then sprinkle the seeds evenly. As mentioned, if you don’t have drainage holes be careful with watering and ensure keeping the soil moist but not wet.
4) Plastic Food Packaging & Take Away Containers
Many food and fruit bought in the supermarket are pre-packed in plastic containers (yes, not very eco-friendly). If you find yourself with no other option, you can give it another purpose and grow microgreens in it!

A benefit of re-using food containers is that many of these containers have a good size, are square, and comes with drainage holes.
If you use any other kind of plastic containers, please make sure to check if they are safe for food. You can easily find this out by checking the number on the plastic. Plastic is categorized using a number system. Containers marked #1, #2, #4, and #5 are safe for food. You should avoid any other type of plastic. They contain material that can leach potential toxins, for example, vinyl and PVC.
How to use it
Depending on the depth of the container, you may need to cut it to the preferred height. A good height is around 2 inches.
Clean the container from any leftovers. If it doesn’t have holes at the bottom, you can easily create a few to ensure good drainage.
Fill up the container with the medium of your choice, sprinkle the seeds, and place it in a dark space. After a few days, once the seeds have germinated, bring them out in the light and watch the magic happen!
5) Ceramic Bowls
Growing microgreens doesn’t have to be dull when it comes to the look and feel! Using a ceramic bowl is pretty for growing inside! If you’re like me, you may have a few in the back of your kitchen cabinet. Why not put them to use! There are also tons of pretty and affordable glass bowls and ceramic ones at the thrift store.

Ceramic bowls (if glazed) are leak-proof, so you will not have any issues with leakage. If you have a ceramic bowl around 2 inches high, then it makes a great container.
How to use them
It’s straight forward. There is not much preparation required, but simply to fill up the bowl with the medium of choice, sprinkle the seeds, and watch them grow!
These containers don’t have drainage holes, so you have to water from the top throughout the entire growth cycle. Check your microgreens more frequently to ensure that you don’t oversoak the medium but keep it moist. When you don’t have drainage holes, it can create an oxygen-poor environment, and that can cause mold to grow. Remember to keep control over your water schedule.
6) Aluminum Pie Tins
If you are a baker or love pies, you may have some aluminum pie tins laying around. Their height and size make them ideal for growing smaller batches of microgreens.

Aluminum pie tins are great because they are lightweight, and you can easily move them around if you need to place them in natural sunlight.
How to use them
Start by piercing a few holes at the bottom of the container to ensure water can drain through. Place it on top of another pie tin or a plate to create a setup for bottom watering.
Fill the pie tin with soil or another medium so it reaches about two-thirds of the container. Sprinkle your seeds, give water and cover the tin with
Avoid using vinegar to clean and sanitize an aluminum pie tin. That can cause a chemical reaction, and holes can be created. If you need to clean the pie tin before use, then use soap and water.
7) Coconut Shells
We love these! If you like the aesthetics of a coconut shell and want to use it as a decorative element in your home, then this is your choice. It is a fun way to present your microgreens! It’s also a great idea if you want to give some of your microgreens as a gift to someone!

The benefits of using coconut shells are that they can retain water well. It’s environmentally friendly, and once you are ready for harvest, you can clean and reuse it, or throw the shell and leftover growing medium in a compost bin. It’s completely compostable.
The downside is the size. Coconut shells are fairly small, so using one is more for the fun of it!
How to use them
Fill up the coconut shells with a loose medium such as potting soil or coconut coir. You can fill it up to the edge. Sprinkle some seeds evenly across the medium, and give a good mist using a spray bottle.
Cover the coconut shells with a paper cloth or aluminum foil during the blackout period to support germination. After a few days, you can expose them to light and see the microgreens grow tall!
TIP: If you have a dinner invitation, plan to grow the microgreens well in advance. Grow and serve them directly from the coconut shells! Place them on the dinner table and let your guests cut new and crisp microgreens! It cannot get fresher than this!
8) To-Go Coffee Cups
Are you regularly buying coffee in a to-go cup? Then next time, hold on putting it in the recycle bin. Use it for growing microgreens instead! They make nice and cute containers!

Coffee cups are fun to use for growing microgreens. You can plant many different types and create a mini indoor garden! If you use paper versions, they are eco-friendly. After you have harvested them, you can throw them in the compost to decompose or put them in the local paper recycling container.
How to use them
Be sure to poke small holes for drainage, and put the cups inside another cup, on a tray, or in a shallow pan to catch any residual water. Fill it up with soil or coconut coir and sprinkle your seeds.
9) Glass Jars
Last but not least, we have added glass jars to our list of containers. Glass jars come in all sizes, both in terms of volume and height. They are fun to use as you can see the soil and the roots as they grow. It makes a nice aesthetic addition to an indoor garden!

You can grow microgreens in a glass jar, but the same as for coconut shells and coffee cups, it’s more for the fun of it, rather than getting a big harvest.
Next time you have emptied a marmalade jar, don’t throw it away. Fill it up with some potting soil and sprinkle some seeds on top.
How to use it
To learn more about growing microgreens in a glass jar, read our full article on this topic.
Let’s wrap it up!
As you have read, there are many alternative ways to grow your microgreens. Anyone can grow microgreens, and you don’t need any expensive equipment. You can use what you already have at home! Repurposing is such a great way to get started or just have fun growing microgreens.
Because it is easy and fun, you can try out growing different microgreens before you decide to go larger.
Our favorite container to use was the aluminum pie tins because of its size. The nicest one is using a coconut shell. We love to grow small batches of microgreens and place them directly on the table when dinner is served!
Use your creativity and start growing! If you have some other ideas, please don’t forget to share! We love to hear from you, get inspired, and learn from your experiences as well!
Happy Growing!
