
Microgreens are known for their health benefits and nutritional power, and people around the globe are growing them indoors with a variety of different instruments, including jars!
Yes, you don’t need to have any specific equipment to grow your microgreens, you can simply use your leftover jars.
So how do you grow microgreens in a jar? To grow microgreens with soil in a jar, follow these steps:
- Soaking the seeds – Soak your seeds in warm water overnight or for a few hours. If you’re using small seeds, then you can skip this step!
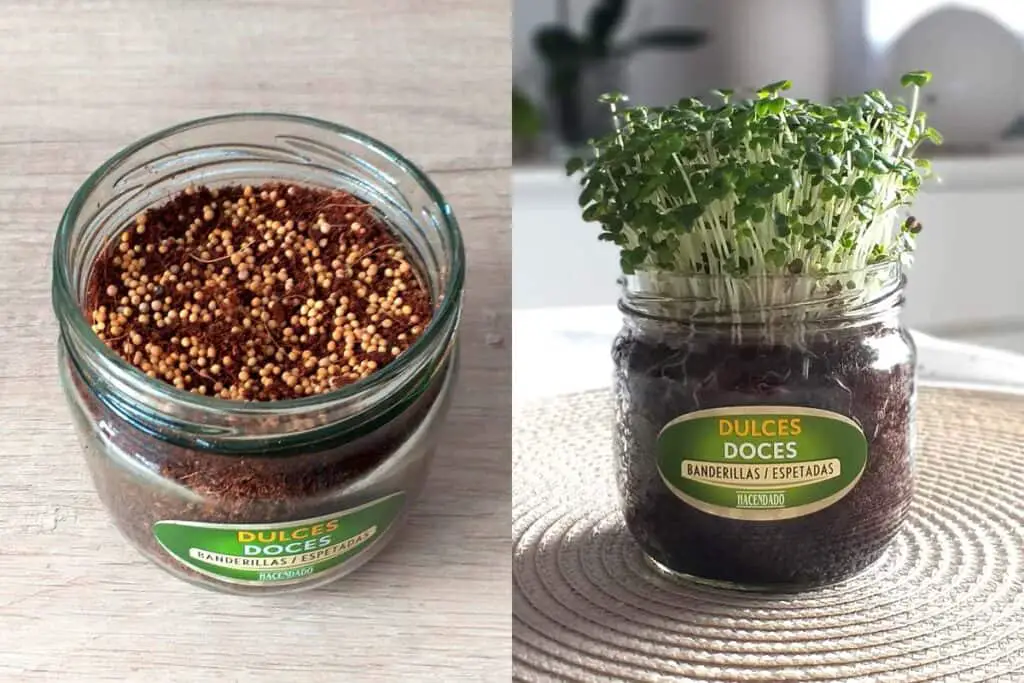
- Filling the jar – Fill the jar ¾ of the way with moist growing soil (at least 1 inch deep, you can pick how much additional soil to put in based on aesthetics).
- Planting the seeds – Plant the seeds by sprinkling them over the soil and pressing them down. Alternatively, you can lay another thin layer of soil instead.
- Watering your seeds – Water lightly and gently, ideally with a spray bottle. The soil should never be dry or flowing with water.
- Cover the jar – Cover the jar with foil, cutting a few holes or place the jar in the dark for a few days. This phase is called the blackout phase and it will support the germination of the seeds. Continuously check on your jar and water once a day.
- Bring them out in light – Once the seeds have started to germinate, grow roots and are about an inch tall, take the jar and place it where it can get natural sunlight or put it under grow light.
- Harvesting the microgreens – Harvest when they’re a few inches tall by cutting them from the bottom; don’t uproot them. This can take as little as a week.
- Enjoying your microgreens – Add the microgreens to whatever you’d like, whether you’re using them in a salad, stir fry, sandwich, or even a hash. Enjoy!
By following these simple guidelines, you can have a vast variety of microgreens in a few weeks!
What are microgreens?
Before we go into more details on how to grow microgreens in a jar, let us just give you some more insight into what these superfoods are.
Microgreens aren’t a special kind of plant with some magical benefits to your body; most green plants and herbs go through a stage where they’re considered a microgreen. This might leave you wondering what a microgreen is.
A microgreen is the stage of a plant’s life that’s right after germination (when the seed starts to bud). They’re perfect for harvesting when they’ve got a few leaves that you can see, typically when they’re about a few inches tall. By harvesting them when they’re so young, you’re not compromising any of the nutritional value like you do when harvesting fully mature plants. If you collect them right before you use them, you minimize the loss in nutrients even more.
Microgreens don’t take long to grow, so you can try out plenty of different seeds and see what you enjoy most! You can get almost any flavor you can think of in microgreens, and they even taste different raw compared to cooking.
Keep in mind that not all seeds are safe to eat as microgreens. Some seeds you’ll find are treated with pesticides that aren’t safe for consumption, and microgreens are too fresh and young to be fed from seeds treated like that. Try organic seeds instead and those marked specifically for microgreens. Learn more about the difference between regular seeds and microgreens seeds!
Microgreens are incredibly easy to grow and can be a great way to get your feet wet in the horticulture world. There’s plenty to learn about what microgreens to grow, how to use them, and why you should be using them.
As mentioned, you don’t need expensive equipment to start growing your own microgreens. You can even use a leftover jar. So let us go into more details on how you go about it.
A Step By Step Guide to Growing Microgreens in a Jar
Growing microgreens isn’t near as hard as the complicated name can suggest. Because the plant isn’t reaching its full size, you don’t have to worry about things like spacing and pests that eat plant leaves. Simply sprinkle the seeds, keep them covered and water, and voila! You have some fresh microgreens ready to go.
1) Soaking The Seeds
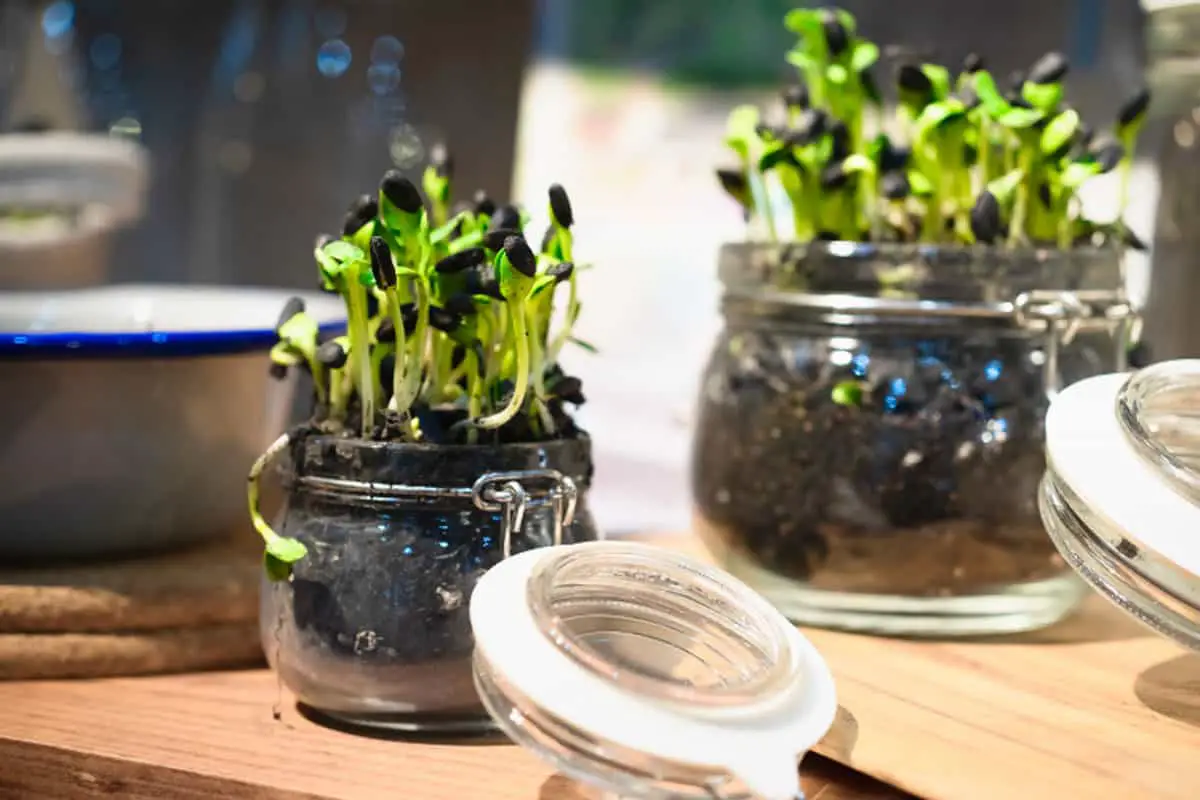
Some microgreens require that you soak the seeds. Those seeds are normally the larger ones, such as sunflower and peas. Small seeds doesn’t needs to be soaked before planting.
Soaking larger seeds stimulates growth; some plants can be grown entirely by soaking them (this is sprouting). By soaking your seeds before you plant them, your seeds will grow faster and be more healthy. You should always check the seeds’ instructions to know if the seeds need soaking before planting or not.
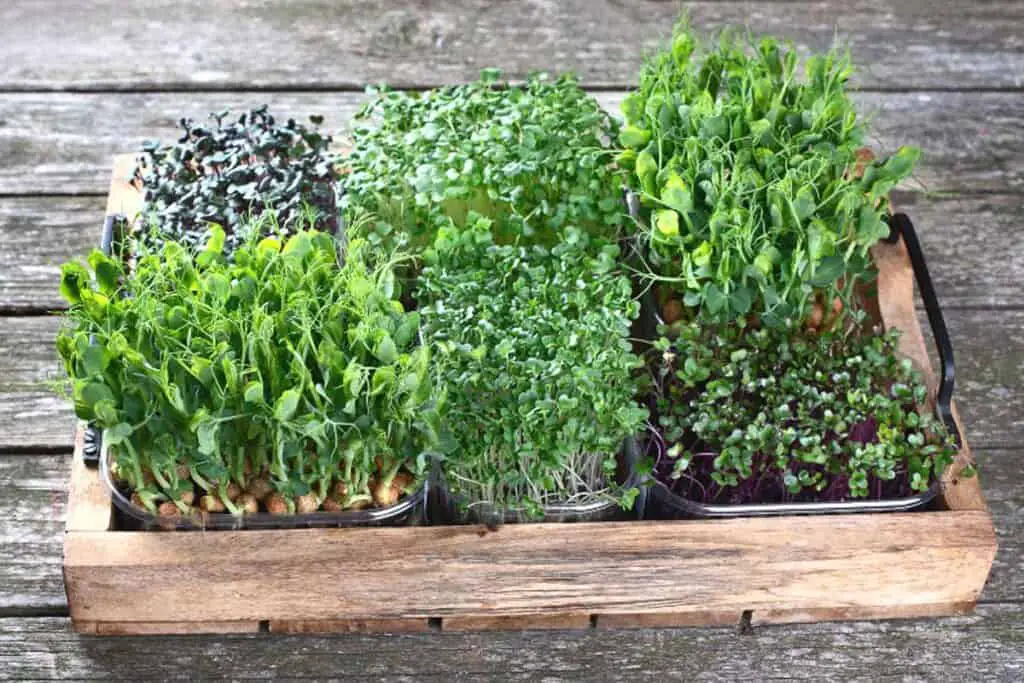
Here are some of the best microgreens to grow. While this list isn’t exhaustive, it’s some of the most popular ones:
2) Filling the Jar
You can use any size glass jar you’d like. When you’re focusing on growing microgreens, you don’t have to worry about the spacing of your seeds. As long as you have room for soil to sit an inch deep, then it’s perfect.
Make sure that your jar is cleaned and sanitized before you begin growing anything in it. A simple way to do this is to boil them for ten minutes. Bacterias like E. Coli and Salmonella thrive in moist conditions, so it’s imperative to make sure your seeds are coming from a reliable source.
Once you have your jar, put 1-3 inches of soil at the bottom. You can always add more if you like the look.
Why Should I Use a Glass Jar?
Because microgreens are versatile plants, you can grow them just about anywhere. Traditionally, people use plastic seedbeds for all their planting needs, whether they’re growing microgreens or just waiting for plants to get big enough to transfer somewhere else.
However, to use plastic trays you should really consider that they are of good and sustainable quality. There are trays specifically made for microgreens which are of solid and durable plastic, intended to last long.
To reuse some types of plastic can be harmful, and some containers are filled with toxins that can impact the environment. While your microgreens won’t be harmed, many people agree that it’s not worth using because of our inability to break plastic down. The plastic seed trays, while cheap, don’t typically last very long, so you’d be throwing out a lot of additional plastic.
Regardless of your stance on plastic, it’s worth noting that glass jars are simply more aesthetically pleasing than plastic trays littering your home. You can grow your microgreens anywhere you want as long as there’s sunlight, so you’re gaining home decor at the same time!
Glass lasts longer, as well. While investing in larger glass containers is more expensive than plastic seed trays, you’ll be able to reuse it for as long as you grow microgreens, saving you money in the long run and stopping you from going through the hassle of buying more trays.
If you are not interested in buying larger glass containers you can use a simple jar to grow smaller batches of microgreens.
What’s the Best Type of Soil to Get?
When you go to find plant soil, you’ll notice right away that there are several kinds to choose from. When it comes to microgreens, you’ll want to look for a potting mix or potting soil.
Potting soil is mainly used for plants that you’re growing in any kind of container. It’s made with a variety of natural compost that’s meant to feed young plants. It doesn’t include any soil in it—the soil can grow bacteria quickly, and that’s the last thing you want to grow your microgreens in. The potting mix is also much better at draining than garden soil.
Garden soil (or topsoil), while much cheaper, is not what you want to grow your microgreens in. It doesn’t give the same aeration, and you run the risk of bacteria growing.
If you’re trying to lower the costs of growing your microgreens, you can mix the two types of soils. Generally, using a 50/50 mix is alright, but you should still be on the lookout for microgreens that aren’t quite healthy or that smell weird. If you’re just starting, try sticking to potting soil.
If you want to take your microgreens to the next level, then you can make your potting mix. It’s a simple process, and you can cut costs even further while growing better quality microgreens that have even more nutrients.
Here’s how you can do it:
- Gather the ingredients, which are or coir fiber, vermiculite, and sand. These things aren’t the easiest to pick up at your local hardware store, so check specialized stores or the internet to make it a little easier.
- You can mix equal parts of the core fiber and vermiculite and half a part of sand.
- All done! Now you can plant your microgreens in your potting mix.
There’s plenty of potting mix recipes on the internet. This is just one of the best and simplest ones for microgreens. You can tailor your potting mix for each of your microgreens as well.
3. Planting The Seeds
Sowing your microgreen seeds is simple. All you have to do is sprinkle them in the soil! Because they’re not growing to maturity, you don’t have to worry about planting them according to the instructions on the back. For example, some plants have to be planted an inch deep when they’re growing to full size; that’s not even possible when your soil layer is an inch deep!
After you sprinkle the seeds, you will want to press down gently on the seeds or spread a thin layer of soil on top (this is for larger seeds).
4. Watering Your Seeds
Overwatering the seeds is a common reason for microgreens to fail. To help keep this under control, use a spray bottle to lightly moisten the soil. Five to ten sprays should be plenty to keep the soil moist without making the water pool or flow. It’s important to not overwater your microgreens.
5. Cover The Jar
Cover the jar with any light covering, like foil, a cheesecloth or a t-shirt you put a few holes in.
Keep the jar in the dark for 3-4 days, until you can see that the seeds have started to germinate. This is the period referred to as the blackout phase. During this time you mimic the natures way for the plant to thrive through the soil.
6. Bring them out in the light
After a few days in the dark, bring out the jar in the light. Place it where you can give it natural sunlight for 5-7 hours a day, or under a grow light. The microgreens will continue to grow. Water them daily once to twice a day.
7. Harvesting the Microgreens
To harvest your microgreen, you will wait about a week until they’re a few inches tall. Then, cut them from the bottom; don’t uproot them. While the microgreens aren’t going to regrow, you should only eat the stems, and cutting them means you’re not getting any part of the root.
What if I Harvest Them Early?
If you’ve heard of eating microgreens, then you’ve probably heard of eating sprouts. They’re both packed with nutrients and healthy for you to eat, but they do have their differences.
Sprouts are the stage before microgreens, a step that you typically don’t see unless you grow them very carefully. They grow slightly faster than microgreens because of it, and they don’t need much light, and no soil is required.
Sprouts grow in containers that act as mini-greenhouses, keeping the seeds moist and in constant water. Typically, you have to rinse sprouts multiple times throughout the day to prevent mold.
Not only is mold attracted to sprouts, but E. Coli and Salmonella are much more likely to thrive in the environments required for germinating sprouts. You can try eating sprouts raw, but you’re always taking a risk. Cooking sprouts almost always eliminates the risk of foodborne diseases, but you can never be 100% certain.
Microgreens are much easier to grow and incorporate them into your diet. They need less care as long as you keep them in a sunny area, and you don’t have to worry about various illnesses as much. They also have more nutrients packed inside of them, making them healthier for you as well.
Most people enjoy sprouts over microgreens because of their texture. While microgreens are used for their flavor, sprouts are widely known for changing the texture of your food, which can be an excellent way to make a dish more interesting and bring more nutritional value to the table.
Here are some examples of delicious sprouts:
- Alfalfa
- Broccoli
- Sunflower Seeds
- Chia Seeds
You’ll notice that some of those seeds are the same as the examples for microgreens. By growing them in different environments, you can grow them to sprout or to be microgreens.
8. Enjoying Your Microgreens
You can store your microgreens in a fridge which will make them last longer. Put them dry in a sealed container and they’ll last you a week or two.
If you put them in wet, they may get smelly or slimy microgreens; it’s not worth the possibility of getting a bad taste.
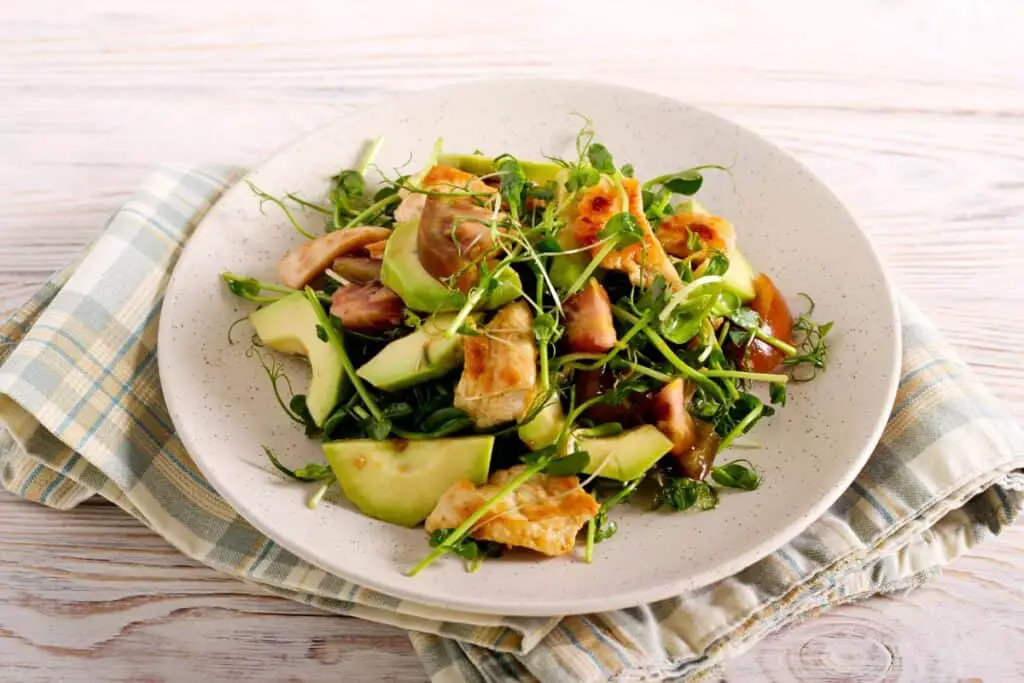
Add the microgreens to whatever you’d like, whether you’re using them in a salad, stir fry, sandwich, or even a hash.
What Are the Best Ways to Eat Microgreens?
One of the most common ways that people eat microgreens is by adding them to salads. Because of the flavor and nutrients they provide, you can substitute lettuce with these! Lemony microgreens go great with most salads, so check out things like basil or sunflower.
Most microgreens taste just as delicious when they’re cooked, whether you cook them with a dish or use them as a topping. Recipes that you would regularly top with basil or parsley can be spruced up by using their microgreen form instead. They work great in a stir fry as well!
If you like a lot of flavor and vegetables in your sandwiches, then add in some microgreens. As with every other meal, they bring a lot of character that easily fits in a sandwich or wrap, and you’ll reap the nutritional benefits while having a more delicious meal.
Just like you would add basil or parsley to a smoothie, you can add their microgreen form as well! You’ll get even more of the taste and more of the nutrients. Playing around with some of the other flavors in microgreens, such as wheatgrass.
Another great way to utilize microgreens is in your baked meals! Things that you would bake that include spinach or other greens can easily be replaced with microgreens, once again giving you the nutritional benefits as well as changing up a standard recipe.
Take a look at the recipes that you cook regularly. Anywhere you use toppings such as basil or parsley, or wherever you incorporate vegetables like cabbage or spinach, try using microgreens in. This will change the taste a bit, but not in a bad way, and you’ll be getting more nutrients than average.
Raw Microgreens vs. Cooked Microgreens
Generally, people choose to eat microgreens raw. Most people grow microgreens because of the dense nutrients you find in them, and cooking microgreens takes away some of those nutrients.
However, you have to use caution when eating raw microgreens. Foodborne illnesses, while not overly abundant, can still lie within your microgreens. If you eat them raw, make sure you’re rinsing them before you use them and every day that you keep them stored in the fridge. If you have any doubts as to the health of your microgreens, then don’t risk eating it.
Cooked microgreens may not be as popular as the process takes some nutrients out, but they’re still delicious. You’ll still be getting some nutrients, so definitely give it a try when you harvest your microgreens. There’s plenty of delicious quiches and breakfast pastries that taste even better with microgreens, and you’re only adding nutrients by using them.
What are the Health Benefits of Microgreens?
Microgreens are dense in nutrients, but what exactly does that mean? If you know about the benefits of eating sprouts, then you already know what microgreens have in them since they’re virtually the same. The only difference is that microgreens have 4-6 times the amount of nutrients in them.
Wellness Mama points out all of the following benefits with eating sprouts and microgreens:
- Neutralizing Anti-Nutrients and Phytic Acid
- Increased Beneficial Enzymes
- B-Vitamins
- Carotene
- Vitamin C
- Non-Complete Proteins
- Antioxidants
- Minerals
If you’re someone who relies heavily on daily vitamins to get all your nutrients in, then microgreens can help you eliminate the need for them! This can save you money, and who doesn’t like getting their daily values from homegrown food?
Summary
Microgreens are a great way to begin growing some of your food. It’s a cheap alternative to buying fresh, full seasoning plants such as basil or parsley. Plus, they’re very easy to grow, whereas things like tomatoes are much trickier.
Other plants that grow until they’re mature have a much longer growing process, and there are many more steps along the way that can go wrong. You have to worry about pests, water levels, and you also need more space, typically, including an outdoor area, which isn’t available to everyone.
You can grow microgreens in pretty much every living situation. All you need is a place with some sunlight and water and space for containers. Besides that, all you have to buy additionally is soil and the seeds (and possibly a water mister to water the seeds with).
Whether you’re living in an apartment, a room, or a house, you’ll be able to grow microgreens. They also look beautiful, and adding some greenery to a room can liven it up. This is especially true when you grow them in glass jars.