
When you start growing microgreens, one decision to make is what medium you are going to use. When you are growing microgreens, the growing medium is the material that your plant grows in. It serves three main functions: 1) supplying roots with water, air, and nutrients, 2) physically supporting the plant, and 3) allowing for maximum root growth.
What is the best growing medium for microgreens? Several mediums work great for growing microgreens. Some of the more common options are:
- Soil / Sterilized soil
- Hemp mats
- Coconut coir
- Burlap
- Vermiculite
- Biostrate
- Rockwool
In this article, we’re going to take a closer look at all seven of these mediums. We’ll guide you through them and discuss some of the most commonly asked questions for people beginning to grow microgreens. Let’s get started!
Growing Mediums for Microgreens
There are several options for growing mediums as far as microgreens are concerned. Let’s take a detailed look at the top seven.
Soil
The first medium on our list to use for growing microgreens is good old fashioned soil. Soil is probably the most popular medium as its what you commonly use for other plants and gardening. It’s tried and true and it works very well. For most potting soils, you won’t have to add any nutrients to them. All you will need is water.
The quality of your soil will matter more to some microgreens than others. You will want a higher-quality soil if you have microgreens with very vibrant colors, for example, the radish microgreens.
Soil is fairly inexpensive. However, it’s not the cheapest medium on our list. High-quality potting soil will cost you around $1 per tray. You can make your money stretch even further, though, if you compost and sterilize the soil and use it for gardening.
Advantages
The benefits of using soil are that it’s inexpensive. It holds moisture well, produces great crop yields, and is organic. Another benefit is that it’s easy to buy locally. You can find this medium in any garden shop or even in the supermarket. We also like soil because you don’t need to add any extra nutrients, and the growth is very predictable and consistent.
Disadvantages
There are a few downsides to using soil too. The main disadvantage of using soil to grow microgreens indoors is that it can be messy to work with. Using soil can also promote mold growth. Another negative is that it also takes up considerable space to store as soil often comes in bigger packages.
If you are planning to sell microgreens to restaurants or to other shops, you will also find that using soil is not the medium to chose. Bringing a tray of microgreens in the soil will be too messy. There are other excellent mediums if you are growing microgreens commercially.
Our Suggestions
You can use any type of potting soil to grow your microgreens. Try the potting soil you have at home. If you want to buy new soil, one that we recommend is Miracle-Gro Indoor Potting Mix. This mix contains coconut coir (we’ll talk more about this later). The coir helps the soil to hold and release water, making the soil easier to re-wet.
Another soil that we really like is the Natural Organic Premium Growing Mix from Burpee. The Burpee mix is enriched with plant food, and like the Miracle-Gro soil, it contains coconut coir.
Both of these potting soils are sterile. That means that they will work great for growing microgreens indoors.
What Works Best in Soil?
Larger seeds work best in a soil medium. The reason is that these types of seeds require to be covered with a layer of soil to promote germination. Two of the microgreens that do particularly well in the soil are sunflowers and peas.
Sterilized Soil
Ideally, you should use sterilized soil when growing microgreens.
When the soil has been sterilized it means that it has undergone heat or chemical processing to kill any pathogens and seeds that are in it. The good thing about using sterilized soil is that your microgreens will grow better, especially when growing indoors. Sterilization assures that the soil is not susceptible to damping off or giving you other plant problems. It also means that you don’t have to worry about mold, fungal spores, or any other harmful organisms.
If you are buying new soil, look for one which is sterilized. If you’re using compost or regular soil, you can sterilize it yourself before you use it to grow microgreens. It requires some work however it’s absolutely doable. There are different ways that you can do this.
First, you can bake the soil in the oven at 180 degrees for about 30 minutes. This method is best if you have a small batch. Now, if your batch is larger, then you can sterilize the soil outside in the sun. To do it this way, you will spread out plastic sheeting in a sunny spot in your yard. Cover the plastic with your soil. Don’t make it any deeper than about four inches.
Next, you will spray the soil with water until it is moist, and then use another piece of clear plastic to cover it. You can hold the plastic in place by weighing it down with rocks. Let the soil bake in the sun like that for at least a month. You can find other methods of soil sterilization here. If you buy the soil already sterilized, it will cost you a little more than $1 per tray.
If you find it to become too much work and tedious to sterilize soil yourself, you can also buy sterilized potting soil mixes. One that we really like is the Espoma AP8 Organic Potting Mix. You can use it both for planting indoors and outdoors and it has all the nutrients required for healthy growth.
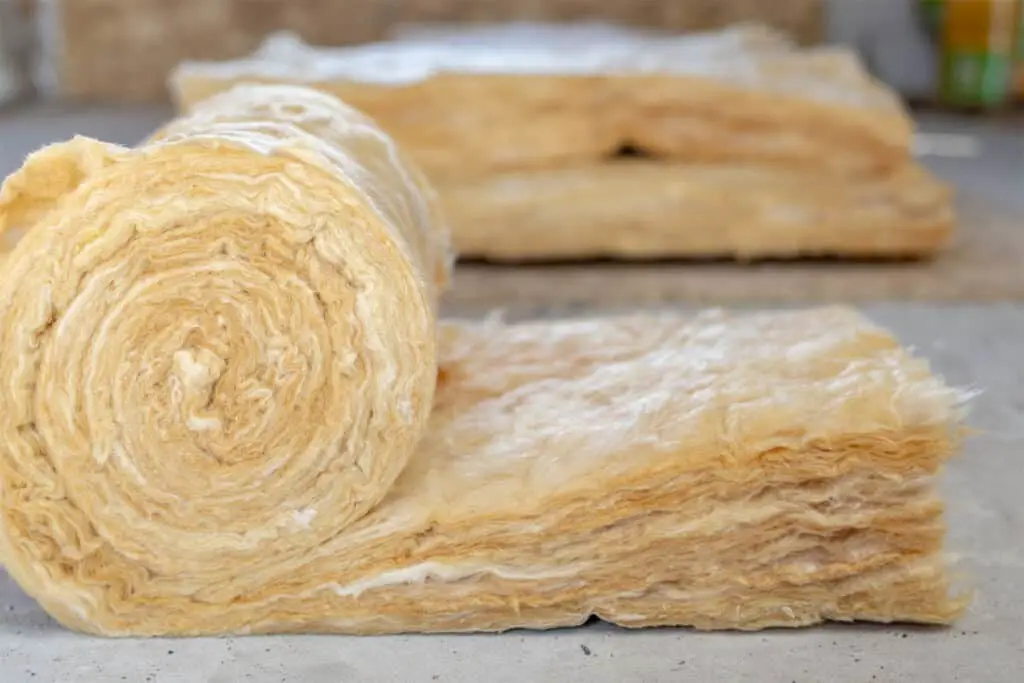
Hemp Mats
Another great medium is the hemp mats. They are made of woven hemp fiber and are designed to distribute water evenly. Hemp fibers are very good at holding water, and hence providing your seeds with the water they require. They are 100% biodegradable and compostable. Hemp fibers are an incredibly resilient fiber comparable to coco coir but with a neutral ph.
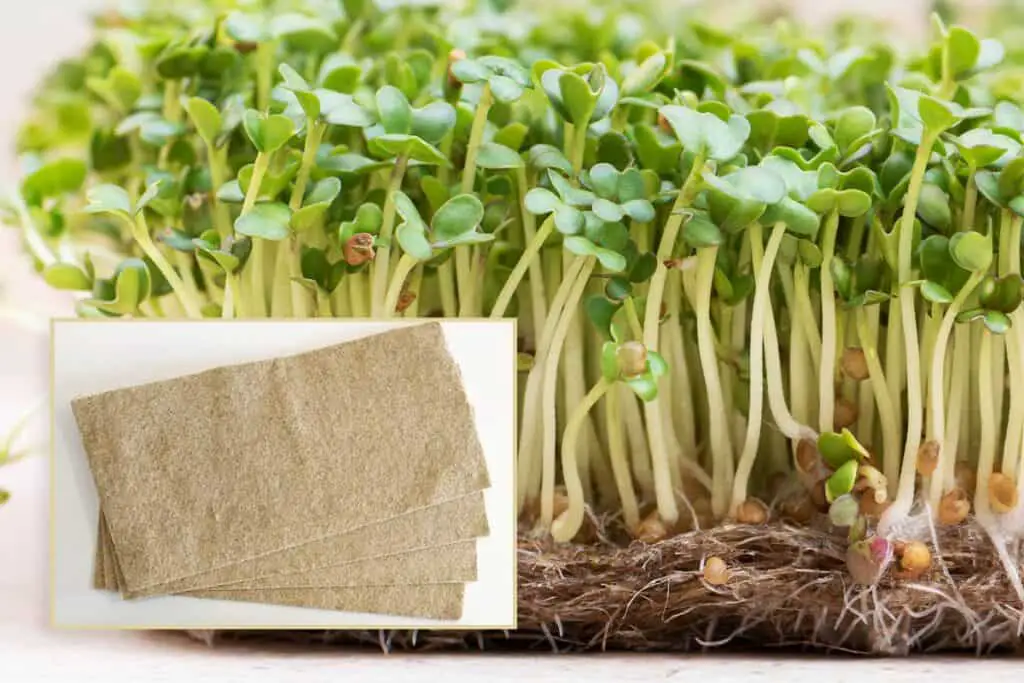
The nice thing about hemp mats is that they provide the right ratio of air and water for your microgreen roots. You don’t have to worry too much about constantly watering because hemp holds water very well. Another great quality of hemp mats is that they are easy and clean to work with. Opposite to soil you are not looking at spilling any medium when growing indoors.
When you buy hemp mats they normally come with two pieces stuck together. The double layers are too thick for growing microgreens but you can separate the layers easily. This will give you twice the medium, and it will keep your cost down.
If you split the layers, then the hemp will cost you around 65 cents per tray, just slightly more than coir.
Advantages
Some of the things that we love about hemp are that you don’t normally have to add nutrients, it composts well, it’s organic, and it provides consistent growth. It’s also as mentioned, an ideal medium for growing indoors. If you are planning to sell your microgreens commercially, this is the medium to use.
Growing on hemp is considerably easy and it’s also a lot less messy than using soil.
Disadvantages
The problem with hemp mats is that they are very flimsy. It is very easy to rip them. This is especially an issue when they are wet. If you try to transfer the hemp, you will likely have trouble.
Hemp is also harder to find than soil or coir.
Our Suggestions
If you want to try the hemp, then we recommend the Terrafibre Hemp Mats. These mats can hold a ton of water, and they are biodegradable and compostable. What is great about this brand is you can try Terrafibre Hemp Grow Mats risk-free as they offer a full refund if you don’t love it as your growing medium.
What Works Best with Hemp Mats?
You can grow any type of microgreen on hemp mats. But kale and broccoli do particularly well on them.
Coconut Coir
Our favorite medium is the coconut coir. This is a very popular growing medium for microgreens. This medium comes from the fiber of coconuts. One of the reasons that people love it so much is that it keeps the right amount of moisture very well.
Coconut coir can either be purchased in the form of dehydrated blocks, sheets, or as a mix similar to soil. It’s common to buy coconut coir as big dehydrated bricks and when it’s in this form, the coir is easy to store and very lightweight. To use the coconut coir, you just add water. The water will make it expand greatly.
Advantages
One of the things that we love about coconut coir is that it produces pretty consistent growth. It’s also easy to find and buy locally. And it’s very cost-effective.
Disadvantages
As great as coconut coir is for growing microgreens, there are still some downsides. Much like soil, tiny coconut fibers can be a bit of a mess if you’re not careful! It doesn’t contain much in the way of nutrients.
Our Suggestions
We recommend the Plantonix Coco Coir Bricks. This high-grade coir is organic with low EC and pH levels. We also love the Mother Earth Coco Bale which is comprised of coco fiber, peat moss, perlite, pumice, and 15 other ingredients. The Mother Earth coir is great for retaining water and it has a very low salt content.
What Works Best in Coir?
You can grow most microgreens in coconut coir. Broccoli microgreens grow particularly well in it.
Burlap
Burlap is another medium that you should check out, especially if you’re trying to grow microgreens on a very tight budget. The cost is the good news. The bad news is that burlap can be difficult to use.
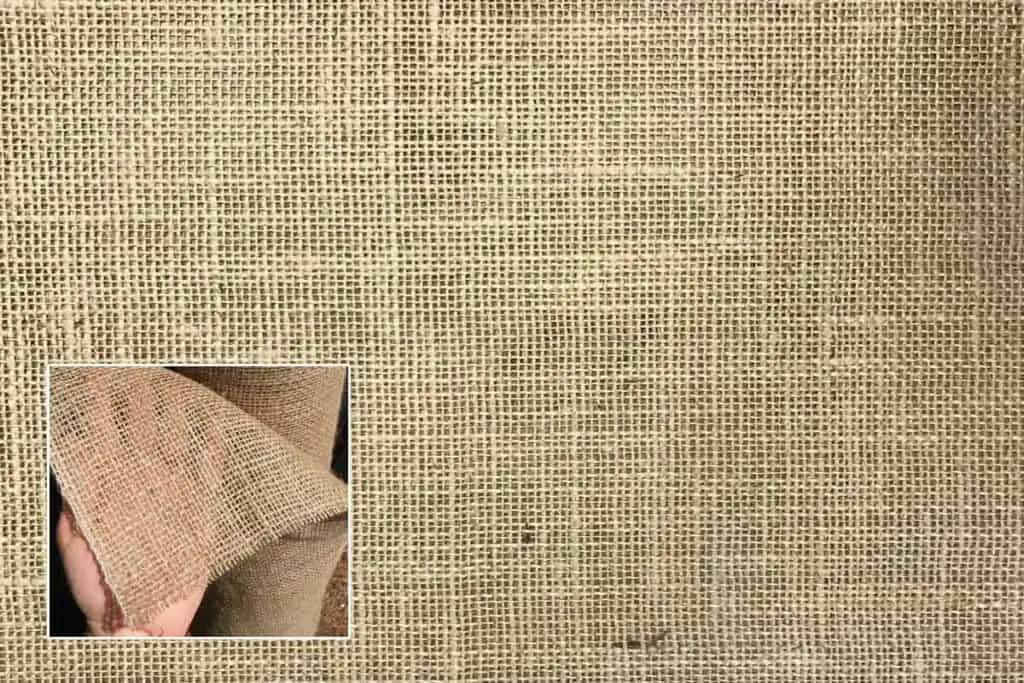
Burlap is a woven fabric which is normally made from the skin of the jute plant. It’s made out of natural fiber, and it’s very strong. It’s produced out of the jute plant which is mainly grown in the Bengal area (India and Bangladesh), and it’s one of the cheapest natural fibers available. This makes it a popular material not only for gardening but also for food grade bags for cereals and sugar and it’s also seen popular in home decor for example as carpets and curtains.
Some growers can get microgreen yields to be nearly the same results as using soil. But it can be a challenge. For most people, burlap takes a lot of trial and error. One reason is that the burlap is a thin material and it should be used in combination with fertilizer to get a substantial amount of crops. The key with burlap is controlling the humidity and temperature.
Burlap will likely be the cheapest medium that you’ll find. You can plan on spending around 25 cents per tray with this one.
Advantages
One great advantage of using burlap is that it’s cheap compared to other mediums. You buy them in rolls and you can cut the size you need to fit your tray. Burlap is also eco-friendly and biodegradable which is something we highly value.
Disadvantages
One of the downsides to burlap is that it’s challenging to use. It works well for some people, whereas for others it’s challenging. Another disadvantage is that it doesn’t contain any nutrients.
We don’t recommend this medium for beginners.
Our suggestions
If you want to give burlap a try, we recommend Burlapper Garden Fabric. This high-quality burlap is biodegradable, eco-friendly, and made of 100 percent natural jute. We also like the Easy Gardener Natural Burlap.
What Works Best with Burlap?
The best crops to grow with burlap are pea shoots and wheatgrass.
Biostrate
Biostrate is another medium that you should check out. It is a felt-like woven material that is ideal for hydroponic growing. If you don’t have the room to dispose of soil, then you will do well with Biostrate. It’s clean, and you can bring it into any kitchen without worry.
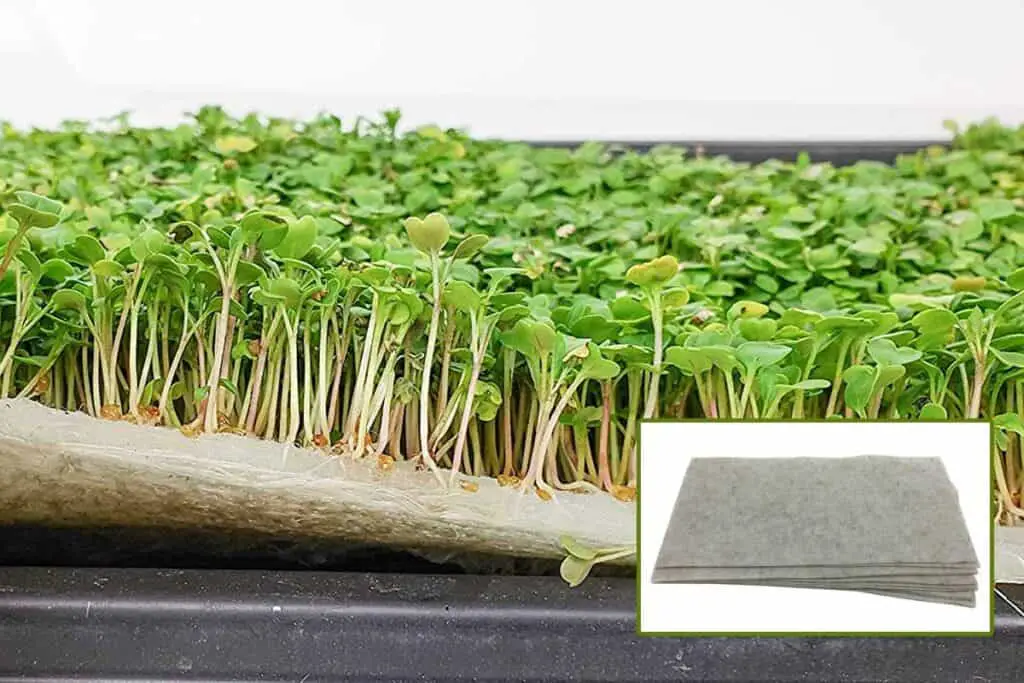
Unlike soil, you will have to add nutrients when you use Biostrate if you want to get a decent crop. You will also have to water more frequently.
If you buy Biostrate in small quantities, it is about 50 percent more expensive than soil. If you purchase it in more significant amounts, you can probably find it for around 85 cents per tray.
Advantages
It’s lightweight, pH balanced, and biodegradable. Biostrate is also pretty thin, so you can easily dispose of it after you use it.
Disadvantages
One problem with Biostrate is that it is only made by one company: Grow-Tech. That means that it can be harder to find than some of the other mediums. Another potential downside is that it is difficult to work with. It’s like the burlap in that way.
Growers also complain about Biostrate drying out too quickly. It doesn’t hold water as well as the other mediums either.
Our Suggestions
If you want to give this medium a try, then you should check out the Biostrate Hydroponic Growing Mats. This set comes with ten different mats for 10 by 20 trays.
What Works Best with Biostrate?
You can grow pretty much any microgreen in Biostrate. Wheatgrass does especially great on it. But certain crops like beets and sunflowers don’t do well at all with this medium.
Vermiculite
Another soil-less growing medium that is worth your time if you’re growing microgreens is vermiculite. Vermiculite is a mineral. It expands when heated to become a very lightweight medium.
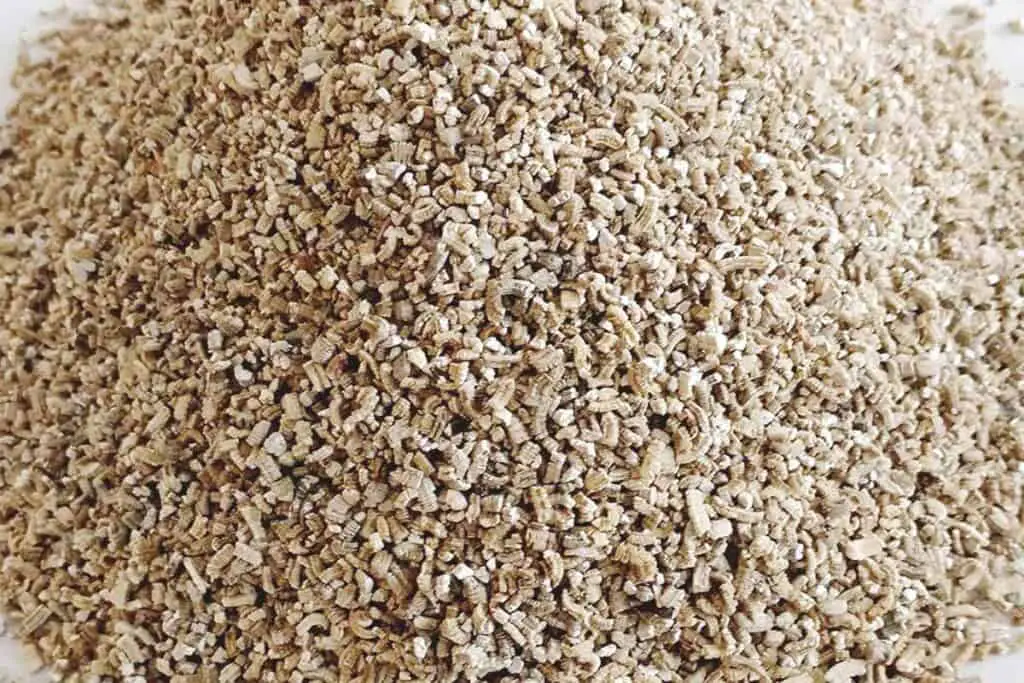
Vermiculite contains magnesium and calcium. It also holds fertilizer and water very well.
You will often see vermiculite added to the soil along with a volcanic glass material called perlite. Adding them to the soil allows for better aeration. But you can also use vermiculite as a growing medium all on its own.
Vermiculite is more expensive than soil. It will cost you around $2.70 per cubic foot.
Advantages
Some of the things we love about vermiculite are that it’s mold-resistant, has a neutral pH, and is sterile.
Disadvantages
One of the downsides to vermiculite is that it offers poor physical stability after you wet it. You have to use extreme care when you handle vermiculite; otherwise, it compacts on itself and loses the ability to hold air.
Our Suggestions
If you want to try vermiculite, then you should check out Plantation’s Professional Grade Vermiculite. Another one that we recommend is PVP Industries Vermiculite.
What Works Best with Vermiculite?
Medium grade vermiculite is appropriate for all microgreens. You don’t want to use coarse grade unless you are working with older plants.
Rockwool
Our final contender for the best growing medium for microgreens is Rockwool. Rockwool is a synthetic material that is most commonly used as insulation.
Manufacturers make Rockwool by combining chalk and rock. They heat the substance and then blow a stream of air through it. This process turns the material into sharp, thin fibers.
Rockwool is more expensive than the other mediums.
Advantages
Some of Rockwool’s good sides are that it retains oxygen well, is chemically inert, retains moisture well, comes in a variety of shapes and sizes, and never impedes root growth.
Disadvantages
The problem with it is that it can irritate the eyes, skin, and respiratory tract. The sharp fibers can also give you splinters when you handle it.
Of all of the mediums on our list, we like Rockwool the least for growing microgreens. Some growers love using Rockwool to grow microgreens, but we just feel the negative outweigh the positives.
Our Suggestions
If you’re set on using Rockwool, then we suggest trying Grodan’s Rockwool Hydroponic Grow Media. This starter kit doesn’t cost too much, and it is an excellent way to try the Rockwool out to see how it works for you. Just be sure that you wear your gloves and keep the substance away from your face.
What Works Best with Rockwool?
You can grow any microgreen in Rockwool, even lettuce.
Can I Reuse My Growing Medium After Harvesting?
To reuse the growing medium after harvest is not something that we do. The reason is that your medium will contain ungerminated seeds, stems, and roots after harvesting. All of that will interfere with the growing process of the new seeds if you try to use it again.
Another difficulty with reusing your medium is that it may lose some of its nutrients. That’s because they are absorbed in the first sowing.
With all of that being said, you can recycle some mediums, like soil, by composting them. If you compost, you should give it at least a month before you reuse the mix. If you reuse the soil too quickly after harvest, the microbes can cause harmful problems to the plants you will grow. You must first remove all of the stems and roots left over from the previous crop. This can be challenging if you are using larger seeds like peas and sunflowers because their roots tend to grow deeper.
To sum this up, it can absolutely be achieved to reuse soil when done right. However, it’s not as simple as storing away the soil for the next year. It’s not difficult but it requires a lengthy process if you’d like to reuse the soil for more than one growing season.
If you are interested to learn more about how you can reuse soil as a growing medium, we have written an article about it.
RELATED: Should You Reuse Microgreen Soil?
Soil vs. Hydroponic Growing
Whether you decide to grow your microgreens in soil or hydroponically is a matter of personal preference. One is not necessarily better than the other.
As we’ve discussed, the soil is messier. If you use a hydroponic grow mat, it will be cleaner, and it’s also going to be easier to set up initially. If you go hydroponic, all you have to do is place the mat in your tray and add the seeds.
Soil, on the other hand, takes a little more work upfront. If you use soil, like a compressed soil brick, you have to screen that and then scoop it into your tray. Then you have to level it out, tamp it down, and water it.
If you go with a hydroponic grow mat, you will have to water more often than if you use soil. So the extra time for the set up pretty much balances out when you factor in the watering.
If you want to sell your microgreens to restaurants, then you will want to go hydroponically because it is so much cleaner. You can’t really bring a tray of soil into a kitchen.
One nice thing about using the hydroponic mats is that they take up less space when you dispose of them. When you use soil, you need considerable space to put all of it after you use it. So if you live in an apartment in the city or don’t have access to composting, then you’ll likely do better with the grow mats.
Cost is another consideration. If you go with something like the Biostrate, then you will spend more than if you used soil. The cost of your medium is going to depend largely on where you live. Some places have very low-cost soil, other places it will cost you more.
One downside to using hydroponic mats is that you can’t reuse them. Soil, on the flip side, you can use it over and over again.
The most important difference between using soil and growing hydroponically is the yield. When you use soil, you will get a substantially higher yield.
Some microgreens just grow better in soil. This is especially true for larger seeds like beets and sunflowers.
Things to Consider When Choosing a Growing Medium for Microgreens
Here are some of the things that you should think about when deciding which medium to use.
Growing Location and Environment
The first thing that you should think about when you’re trying to choose the best growing medium for microgreens is your location. How much space do you have? Do you have a place to put soil before and after you use it?
Soil and coir take up considerable space. If you do not have room for all of that, you can use something that takes up less space like burlap, Biostrate, or hemp mats.
You should also factor in your environment if you plan to grow outside. Some microgreens grow better in warmer temperatures than others.
Ease of Handling
Another thing to consider is how easy is the medium to handle? This will mostly be a matter of personal preference. You can get growing mediums in two main forms: mat and loose.
The mats are nice because they’re fairly easy to use. You don’t have to fret about a lot of fuss and muss. You simply put the mat in your tray and add your seeds. That’s it.
Most mats come in the size of 10 inches by 20 inches, which is the same measurement of most microgreen trays.
In addition to the mats, you can also get the most growing mediums in a loose form. The only bummer for these is that they’re messy. Some of them also require some extra steps before you can use them. An example of this is coconut coir. With this medium, you have to rehydrate it first to expand it. This process can be messy.
Do you want to sell your microgreens to local restaurants? If you plan to sell them live, then you will want to use one of the cleaner mediums.
It’s up to you to determine which medium is the easiest to handle. The results will basically be the same, so choose the one that works best for you.
RELATED: Can You Grow Microgreens in Coffee Grounds?
Added Nutrients
The last thing you should consider is the nutrients. This is not the most important factor because microgreens don’t technically need much in the way of nutrients to grow. If your medium has some added nutrients in it, it can only help your crop.
What fertilizer to use and how to apply it to your microgreens depends on what growing medium you are using to grow your microgreens.
If you’re using soil, it likely has all of the extra nutrients that you will need. Some of the other mediums like burlap and coconut coir contain virtually no nutrients. So if you use one of these mediums, you may want to add some.
RELATED: How to Fertilize Microgreens: Everything You Need to Know
A Final Thought
When you start the journey to grow microgreens, one of the things we found challenging was to decide what medium to use. There are many alternatives to choose from and we wanted to be sure that we chose the right one considering our living conditions and to achieve a healthy harvest. We have done the research and learned from others what works and we have ourselves tried using soil, coconut coir, and hemp mats. Soil gives great crops, but we find it a bit too messy to use when growing indoors. We prefer to use coconut coir or growing mats which makes it easier and cleaner to work with.
Hopefully, by providing you the result of our research and giving you more insight into the different options out there, we’ve helped you decide which medium you want to use to grow your microgreens. All of the mediums that we present work great. But which one works the best for you will be partly a matter of personal preference and partly a case of trial and error. Play around with growing mediums, find what works, and find what doesn’t.
As mentioned, for us, we’ve found that soil produces the best microgreens and the highest yields. The downside is that it’s messy. Our favorite for growing microgreens indoor has so far been using hemp mats.
Happy growing!