
Let’s talk about watering! Water is one of the essential elements needed when growing microgreens, but it’s also one of the things most growers find challenging. When you grow microgreens in soil, you can do this in 2 steps and get it under control!
As you plant your seeds and throughout the germination phase, you water your microgreens twice a day from the top-down. When the seeds start to grow and develop stems and leaves, you continue with the same frequency but swap to bottom-up watering. It lets you better control your watering schedule, directly nurture the roots, and give your microgreens the right amount of water to thrive.
Microgreens are not like other plants. They grow fast, are delicate, and they need to be looked after every day. Microgreens are sensitive to both over-and underwatering and subtle to growing mold, fall over, smell bad, etc.
In this article, we’ll share the 2 steps to water your microgreens in soil. We will also look into the watering essentials, the equipment you can use, and the early signs of watering problems.
Watering Essentials
There are a few essentials you should know about watering microgreens in soil. If you keep these at hand, you are at a good start to get it right.
- When you water microgreens in soil, you have to be careful not to oversaturate them. Soil holds water well but dries out quicker than other mediums such as coconut coir.
- You can use regular tap water to watering your microgreens. However, if your tap water has a high level of calcium or a very low/high PH level, you should consider using filtered water. (Normal drinking water generally has a neutral pH of 7.)
- You can water without extra nutrition when you grow microgreens in soil. Soil release nutrients to your greens naturally, and there is no need to add extra nutritional elements to the water supply.
- Use water that is room tempered. Don’t give your microgreens cold nor hot water. The ideal temperature is around 70°F/20°C.
- Always keep the water fresh. Stagnant water is a breeding ground for bacteria.
- Water the soil & roots, not the leaves! Remember that it’s the roots that need access to water and not the leaves. Always give water close to the soil and avoid giving water on top of the leaves as it builds up weight, and they can fall over!
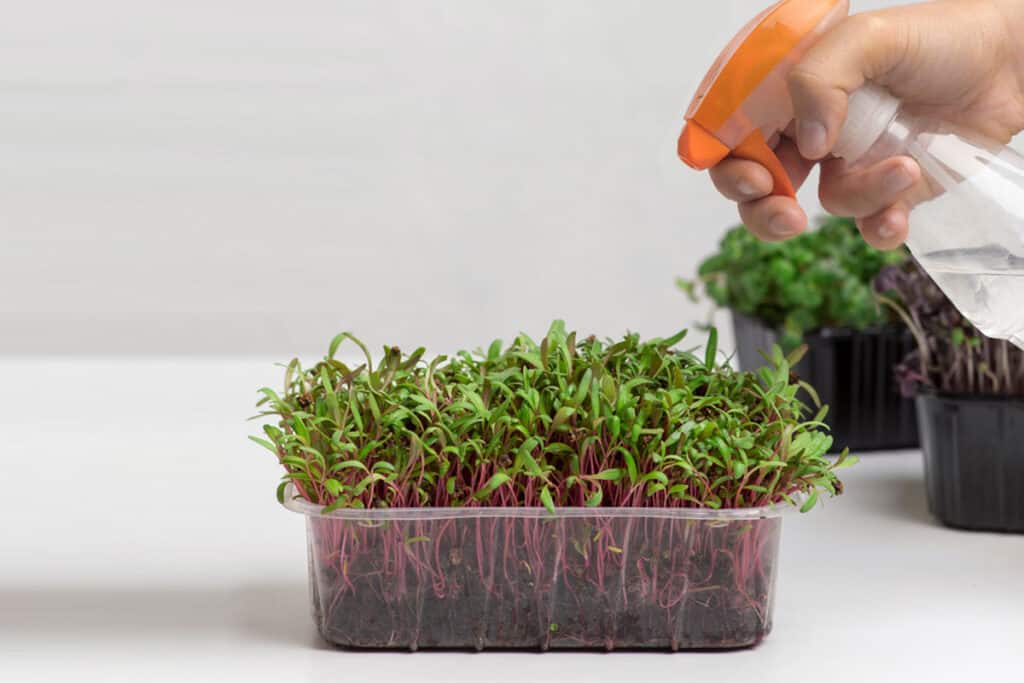
- Use a mist spray bottle instead of a watering can. Microgreens are delicate and don’t need as much water at a time as other household plants. Misting is an easy solution to the risk of overwatering your plants.
- Ensure that you are using a clean spray bottle and not one that has been used with chemicals or other toxic liquids. There may be strains of chemicals left in the bottle, which will damage not only your microgreens, but it may be toxic.
- Don’t over or underwater! It may sound obvious, but you want your soil to be moist and not dried out, nor soaked. If it is continuously wet, it will begin to smell, the roots will rot, mold will start to build up, and other diseases can find a home in the soil’s wet environment. Leave the microgreens for a day or two without water and when you feel that the soil is getting dry, start watering again. It can be tricky to get it “just right”.
- Don’t overwater if you miss a watering session. This is not healthy, simply pick pick up at the next watering time instead of flooding your tray with a large amount of moisture that it can’t absorb.
As we have these basics in place, let us look at the 2 step method you can use to watering your microgreens.
How to Water Microgreens in Soil in 2 Steps
To better control your watering, you can use a two-step method. We will explain how you can easily water your microgreens throughout the entire crop cycle.
- Step 1 – Top-down watering during planting & germination (blackout) phase
- Step 2 – Bottom-up watering during the growth phase
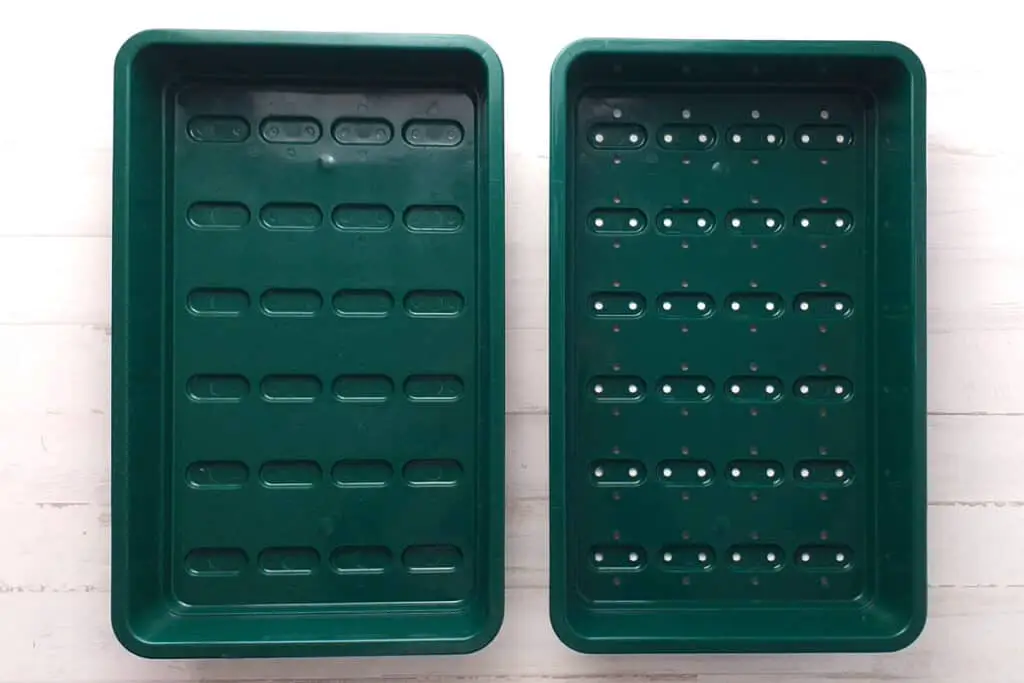
To water your microgreens using this two-step method, you need to plant your seeds in a container or tray with drainage holes and place it on top of another without holes. You use the bottom tray for watering. It will allow any excess water to get through, and you will also be able to water your microgreens from the bottom up. When the seeds have germinated and grown roots, they will push down the tray throughout the holes.
You can also apply these guidelines if you are growing microgreens in other mediums than soil, such as coconut coir or potting mix. Just remember that the water retention varies depending on the medium you use.
Step 1 – Top-Down Watering
Top-down watering is what it sounds like. It means that you are water your microgreens from the top. You will do it the same way as you would water vegetables in your garden, give water from above directly on top of your soil.
When Should You Use Top-Down Watering?
You use top watering at the early stages of the growing cycle when you plant the seeds and as they germinate. During these phases, the seeds have not yet developed any roots.
Microgreens are delicate, and you should be careful not to wash the seeds away or break the microgreens as they grow taller. You want to avoid getting a heavy load of water on top of them, so using a spray bottle or a hose with a ‘mist’ setting is better than a watering can.
If you are growing your microgreens in a container or tray without drainage holes, you can only use the top-down watering method. In this case, there is no other way than to give the water on top of the soil.
Watering During the Planting Phase
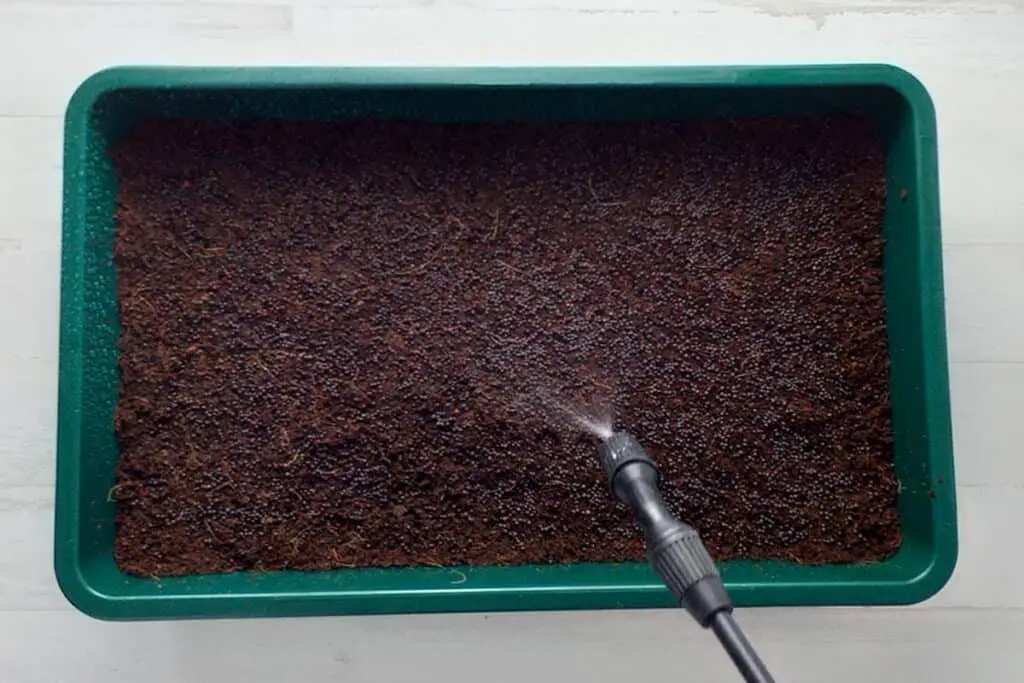
When you plant your microgreens, you sprinkle the seeds evenly across the soil, and then you will leave them to germinate for a couple of days. Naturally, as you have planted your seeds, you will be watering from above because they have not yet developed any roots.
After you have sprinkled your seeds, you should give them a good mist and get the soil moisture without soaking it. You want the soil to be wet across the tray/container, but you don’t want puddles of water.
Mostly the seeds are not covered but sitting on top of the soil. If you are watering directly using a watering can, there is a risk that you wash them away. Use a spray bottle, a hose with a mist setting, or a pump/compression sprayer. They are all great equipment to use because you can be gentler when watering the seeds.
If you are growing in a container without drainage holes, you have to be careful not to give too much water as it won’t let the water drain away.
Watering During the Germination (blackout) Phase
When you have planted your seeds, you put them in the dark (blackout phase), and they will start to germinate and slowly grow roots. During this phase, you should continue to lightly water from top-down as your microgreens have not yet grown roots that are long enough to be watered from below.
It can seem obvious how to water microgreens from the top, but you should be conscious of the weight the water can put on your greens. If you pour water on top of your germinated seeds, they may flip over, and then maybe the roots will not find their way through the medium. Also, be careful as they grow taller as they may break.
Water once or twice a day so that the soil surface never dries out, but remains constantly moist. We cannot give you the exact guidelines because not everyone’s home conditions are the same.
The ideal growth condition is if your home has a temperature of around 70F/20C, you have good airflow, and the humidity level is 40-60%. During these conditions, watering once in the morning and once in the evening is sufficient. If you have a colder temperature or higher humidity, once per day may be enough or even every second day.
Step 2 – Bottom-Up Watering
Bottom-up watering means that you are watering your plants from underneath, giving water directly to the roots. When you water them from the bottom up, the roots get stronger because they are growing directly down toward the moisture.
When Should You Use Bottom-Up Watering?
After your seeds have germinated and started to grow roots, you bring your microgreens out from the dark and place them in the light. This phase is called the growing phase. We will now shift to watering the microgreens from the bottom up.
Watering During the Growth Stage
As earlier mentioned, you’ll need two trays or containers; one with drainage holes and one without. The secret to bottom-watering lies in the equipment.
You pour water directly into the bottom tray, and the drainage holes in the top tray allow the water to absorb into the soil over some time without over-saturating it.
For a 10/20 tray, add a cup of water two times a day. You have to be careful not to water more than the soil can absorb. If the soil is left too wet for too long, it can cause the roots to rot, and the microgreens can grow mold.
You can measure if you have given enough water by checking the bottom tray. The water should absorb during the day. If there is still water in the tray in the evening, the soil is too wet. In this case, empty the bottom tray, leave it for a day, and water again when the soil is moist but no longer oversaturated.
Not using a tray with holes?
If you are using a container without drainage holes and a bottom tray, you must water your microgreens using the top-down watering method. You should be paying extra attention to the soil and check so that it is not getting oversaturated.
A tip is to give a bit more watering on the sides of the container. Make sure that all the soil is getting wet but not soaked. We cannot repeat this enough as this is the main reason your microgreens will grow mold.
How Often do Microgreens Need Watering?
Microgreens that are grown in soil will need water, in general, twice a day. Soil has a good level of water retention, but when you grow microgreens you use a thin layer on a small surface, and this will dry out quicker compared to the soil in for example a potting plant.
Give water, one time in the morning and one time in the evening. Use this timeline as a starting point and adjust as needed. There is no universal watering schedule that works for every microgreen in every climate.
Factors, such as humidity and temperature, will have an impact on the amount of water needed. If you for example have microgreens in a sunny and hot place, you may want to check on your crops more frequently. You will know this by checking your soil. It should always feel moist but not wet.
How Much Water do Microgreens Need?
The amount of water depends on the type and the volume of soil you are using. As a reference, we use the measure of one cup of water (twice a day) for a 10/20 tray. Continually check that the soil is not oversaturated or too dry. Then you will have to adjust the amount of water you give.
Soil is a natural resource, and there are various soil types with different water retention levels. Each of them has its own characteristics that provide growing benefits and limitations. When growing microgreens at home, we recommend that you use organic potting soil. Potting soils are often well-drained, well-aerated, and has a pH that is close to neutral.
The Equipment
Having the right equipment will help you to get the watering under control. Let us sum up what different things you can use.
Mist Spray Bottle
Using a simple mist spray bottle is great because it’s gentle to the delicate microgreens. We recommend using one with an adjustable nozzle so you can adjust the strength of the fine mist.
Garden Pump Sprayer
Using a garden pump sprayer is ideal for watering microgreens. The brass nozzle adjusts the water spray intensity from direct spray to fine mist spray. They provide an even distribution of water, and you can even lock it for continuous spray if you are watering several trays.
Trays With Drainage Holes
Using trays with drainage holes will give you a better control, and you can water your microgreens from the bottom up. To create this setup you need two trays – a bottom one without holes and a top tray with holes that you can place inside the bottom tray.
In the past we’ve written an entire article about the best growing trays on the market. If you haven’t bought your trays yet or need new ones, this article will guide you.
Early Signs of Watering Problems
Watering is one of the most common reasons for microgreens to fail. Watch out for signs for underwatered or overwatered microgreens. Your microgreens will tell you when they need more or less water. An underwatered microgreen will look pale and fall over while, and an overwatered one will wilt, and mold will grow.
There are a few ways you can check if your watering schedule needs to be adjusted.
Check the Roots
You can learn a lot from checking the roots. Are they dried out or starting to rot? Keep an eye on them as they may dry out if they aren’t getting enough water. If they are getting brown and the microgreens are falling over, it’s a sign of dryness. Healthy roots are white.
Check for Excess Water
If you are using a bottom tray, you can check if there is excess water. If you have watered your microgreens using a bottom tray and it is not getting absorbed after a day, it’s a sign of overwatering.
In this case, remove any excess water, let the medium dry out a bit and then start over with the bottom watering. If you leave the water, the roots may rot as they will be constantly wet.
Check the Weight
It can be tricky to know if you have given too much water. Another way to measure the amount of water provided is to check the weight of the container. If it is heavy, it does not need watering; if it feels light, it does require water. With a little practice, you can soon tell the amount of moisture remaining in the container.
We’ve covered the topic of common problems with microgreens in other articles.
Keep a Record
One piece of advice we can give you to help with watering is to keep records of what you do. Taking notes of how you water your microgreens is a great practice. If you write down when you water and how much, you can later adjust if you see things don’t go well and get your watering schedule “just right”.
There are many ways to keep track of this — use a pen and paper, excel spreadsheet, or simply add notes on your phone.
Our Conclusion
We hope we have provided you the answers you are looking for when it comes to watering your microgreens in soil. Doing it excessively is one of the most common issues causing microgreens not to grow healthy. As we have mentioned, there is no universal guide, but there are guidelines you can adopt, and then you may have to adjust how you treat your crops.
It is easier to save a crop that has been given too little water than one that has been saturated. The reason is that when you start to see mold, it is difficult to get rid of. Make it a habit to check your microgreens daily, one time in the morning and one time in the evening to see if they are healthy, still wet, or need a refill.
Happy growing!