
Peat moss is a common medium used to grow vegetables and herbs. One of the best characteristics of peat moss is that it holds water very well and its sterility. This means that it doesn’t have any bacteria, fungus, and weed seeds. This makes it perfect for gardening, so what about microgreens?
Can you grow microgreens in peat moss? Yes, using peat moss for growing microgreens is great, as it can absorb and retain water very well. It’s great for seed starting and it mixes well with other mediums. The downside though, is that it’s not considered eco-friendly as it’s a non-renewable resource.
Let us walk you through what peat moss is and how you can use it, the benefits it holds, and the downsides.
What is peat moss?
Peat moss is a commonly used growing medium for gardening. It’s an all-natural, organic medium used with soil.
It’s a material that origins from peat bogs also know as peatlands. Over thousands of years, plant materials buried underwater in swamps have broken down to form a type of soil called “peat”.
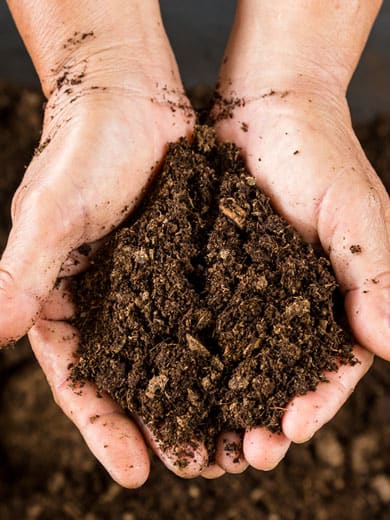
In short, to make the peat moss, the bog is dried out so the peat can be sucked up with vacuums. The peat is then dried more, screened, and compressed into the bales of peat moss which is the final product that we can buy in garden stores. It has a fine and dry texture.
“Peatlands are carbon-rich ecosystems that cover just three per cent of Earth’s land surface, but store one-third of soil carbon. Peat soils are formed by the build-up of partially decomposed organic matter under waterlogged anoxic conditions.”
Source: Nature
Peat moss is also known as sphagnum peat moss. Don’t confuse this with sphagnum moss which comes from the same the plant but is still different. It has another texture and commonly used by florists for line wire baskets.
In stores, you may find that the peat moss is sold in bigger bags similar to soil and the sphagnum moss in smaller bags, either chopped up or in strings. It’s good to know the difference to ensure that you bring home the right medium for growing your microgreens.
How is peat moss used for growing microgreens?
In general for gardening, peat moss is used as an amendment to soil and not stand alone. The reason it’s not used by itself is that it doesn’t hold any nutrition.
For microgreens though, you can use it both as an amendment or as a sole medium when growing hydroponic. This is because microgreens grow very fast compared to growing the full vegetables.
What are the benefits of using peat moss?
Using peat moss is very commonly used for gardening as it’s practically free of weeds, insects, and chemicals. It has a high water-holding capacity and has a great ability to give good air space. This means that plants and vegetables thrive in it.
So what are the main benefits of using peat moss?
- Water retention – It supports water retention as it can retain up to 20 times its weight in water.
- Soil structure – Adding peat moss to soil gives an improved soil structure. It helps loosen heavy soils and prevents compaction.
- Absorb nutrients – Even though it doesn’t have any nutrition of its own, it absorbs nutrients from other mediums. This means that when mixed with soil, for example, it holds on to nutrients that may otherwise leach out.
- Promotes healthy growth – It aerates and allows roots to breathe and grow better.
- Free of harmful microorganisms – It is a natural resource free of weeds and toxics.
What are the downsides of using peat moss?
You may hear and read that peat moss is not eco-friendly and that it poses a threat to the environment. So why is that?
According to the University of Leicester, peat bogs are found in 175 countries across the globe. The largest concentrations found in northern Europe, North America, and Southeast Asia. Peat bogs are very important to our eco-system and when peat moss is derived from these blogs, it damages them. Peatland restoration is a multi-year process and it can take up to 20 years to return to an ecologically balanced system. This is why it’s not considered a renewable resource.
“The overuse, exploitation and drainage of peatland habitats have a host of environmental implications such as land subsidence, wildfires and disruption of the global carbon balance.”
Source: University of Leicester
It’s important to check where the peat moss sold in the garden shops origin from. Most peat moss used in crop production comes from Canada where it is strictly controlled and subject to strict regulatory frameworks.
Besides the environmental factor, there are some other downsides in using peat moss:
- Low in nutrients – It doesn’t contain any nutrients as well as microbes so you may consider adding fertilizer as a complement for stronger growth.
- Dryness – It’s great for retaining water but it also is challenging to get it moist once it has dried out.
- Pricy – it’s not the most expensive medium on the market but it does cost more than most.
How to grow microgreens using peat moss
Growing microgreens in peat moss are much similar to using other mediums. We will guide you through how to use peat moss as an amendment to soil and how to use it stand-alone.
Mix with soil
- Prepare the soil – First, you need to mix your compost/soil with the peat moss. Take 1/3 peat moss and 2/3 compost/soil and mix it lightly but thoroughly.
- Add to tray – Place the soil mix in the tray without draining holes. Evenly spread a layer of the soil, about 2 inches high.
- Spread the seeds -Take your seeds and spread them evenly across the tray. Avoid having the seeds ending up on top of each other but try to spread them out evenly so you get a nice crop that will be healthy and easy to harvest.
- Give it water – Next up you take a water spray bottle and apply an even mist of water. Depending on the seed you are growing you may have to apply another thin layer on top of the seeds. This is needed for larger seeds such as peas and sunflowers. Always read the instructions on your seed package to ensure you are applying the right measures.
- Blackout period – Once the tray has been filled with soil, seeds and been watered, it’s time for the blackout period. Place another tray on top of the tray used to give total darkness. If you don’t have another tray you can place the tray in a dark location such as a cupboard. Depending on the type of seed you need to keep it in darkness for a couple of days to initiate the germination. Read the instructions on the seed package!
- Keep it moisturized – During the blackout period, you need to ensure you keep the soil moistured but not saturated with water.
- Give it sun – When the seeds have germinated and you can see that they have started to grow, you take out the tray from the darkness. Remove the tray used as a lid and place it in a sunny location.
- Ready for harvest – Keep watering your microgreens during the sunlight period. After about two weeks (again depending on the type of seed you grow) your microgreens are ready for harvest.
Use peat moss stand-alone
- Select the tray – Ideally use a tray with holes and put it in another without holes. This will then allow you to put the water in the bottom tray and the roots in the peat moss will soak it up from underneath.
- Mix with perlite (optional) – Since peat moss has such high water retention but no nutrition, it’s popular to mix it with some perlite. Perlite is used to provide air around the roots of plants and to both help retain water and improve drainage. 70% peat moss and 30% perlite mixture is a good ratio.
- Add the peat moss – place the peat moss into the tray by evenly spreading it. Fill up the tray to about 2/3 of its full volume (approx. 2 inches peat moss.)
- Spread the seeds – Once you have the peat moss laid out you add the seeds. Spread out your microgreen seeds evenly across the tray. Depending on the type of seeds you use, you may have to add another layer of peat moss on top.
- Blackout period – Once the tray has been filled with the peat moss, seeds and been watered, it’s time for the blackout period. Same as for soil, a great idea is to place another tray on top of the tray used to give total darkness. If you don’t have another tray you can place the tray in a dark location such as a cupboard. Depending on the type of seed you need to keep it in darkness for a couple of days to initiate the germination. Read the instructions on the seed package!
- Keep it moisturized – During the blackout period, you need to ensure you keep the peat moss moistured but not saturated with water. Instead of giving the water on top of the seeds, you add the water in the tray underneath the ones with the holes.
- Give it sun – When the seeds have germinated and you can see that they have started to grow, you take out the tray from the darkness. Remove the tray used as a lid and place it in a sunny location.
- Ready for harvest – Keep watering your microgreens during the sunlight period, again by adding water on the bottom tray. After about two weeks week (again depending on the type of seed you grow) your microgreens are ready for harvest.
Can you reuse peat moss?
It’s not ideal to reuse peat moss for growing microgreens as it will be filled with roots. Instead, take the leftovers and add to your compost and use it for outdoor gardening.
If you have peat moss which has not been used yet, you can store it for about a year if you keep it well contained.
Alternatives to peat moss
As more and more people are becoming conscious about the damage done to peat bogs, they find alternative mediums for growing. We have listed some great options which all nourish your microgreens to grow healthy.
Soil
You can use the traditional potting soil to grow microgreens. We don’t find it ideal for indoor growing as it’s a bit messier to work with. However, it’s the most common medium used for growing any plants and veggies and it’s well-tried. For most potting soils, you won’t have to add any nutrients as they have it in them. All you will need is water. As we have mentioned in this post, adding peat moss provides further benefits but it’s not a must, you can use soil stand-alone.
Coconut coir
One of our favorites and a great alternative is using coconut coir, which is a renewable resource. Coconut coir is a lightweight soilless medium made from coconut husks. It’s a dark brown and fibrous material with fibers that are very strong and easily managed. It has the same benefits as the peat moss but a more eco-friendly option.
RELATED: How to Use Coconut Coir for Microgreens: A Must-Read Guide
Hemp mats
Hemp mats are used for growing hydroponically. They are made of woven hemp fiber and are designed to distribute water evenly. Hemp fibers are very good at holding water, and hence providing your seeds with the water they require. They are 100% biodegradable and compostable.
Other alternatives to grow your microgreens are:
- Burlap
- Vermiculite
- Biostrate
- Rockwool
RELATED: Best Growing Medium for Microgreens
Summary
There are many different mediums to use and peat moss has been around for ages and it’s well known and used for gardening. It has great benefits for growing microgreens due to its ability to retain water and it’s free from harmful microorganisms. The latter is very favorable when growing your microgreens indoor.
As with most things, there are pro’s and con’s and when using peat moss you should consider its origin and how has been produced. It’s known that the production of peat moss is a threat to the eco-system as it’s not a renewable resource. Find out where the peat moss is coming from and if it’s produced under controlled circumstances.