
Growing your own food brings joy and even more when you quickly see them grow into superfood! One of the easiest and fast-growing vegetables is sprouts, but did you know that if you get those seedlings to grow further, they will turn into highly nutritious microgreens!
Growing microgreens at home is very simple, and the beauty of it is that you don’t need any special and costly tools. You can use different types of containers and as well a Sprouter.
If you already have a sprouter at home, then this article is for you. We will walk you through how you can use your Sprouting Tray and Sprouting Jar to grow microgreens!
If you are in the hunt for a new sprouter or want to kick off your new adventure with sprouting and growing microgreens, we have listed some great Sprouters available in the market!
Let’s get to it!
- What is the difference between sprouts and microgreens?
- Can you grow microgreens in any seed sprouter?
- How to Grow Microgreens in a Sprouter (Step-by-step Guide)
- How to grow microgreens in a Sprouting Tray
- How to grow microgreens in Sprouting Jar
- Best Sprouters Available for Purchase
- Final Tips for Growing Microgreens in A Sprouter
- Let’s wrap it up!
What is the difference between sprouts and microgreens?
Before we get into how you grow microgreens in a Sprouter, let’s first see the difference between sprouts and microgreens. Not only are they cultivated differently, but the appearance also varies. Knowing the distinction between the two will give you a better understanding of the growth process and make you successful!
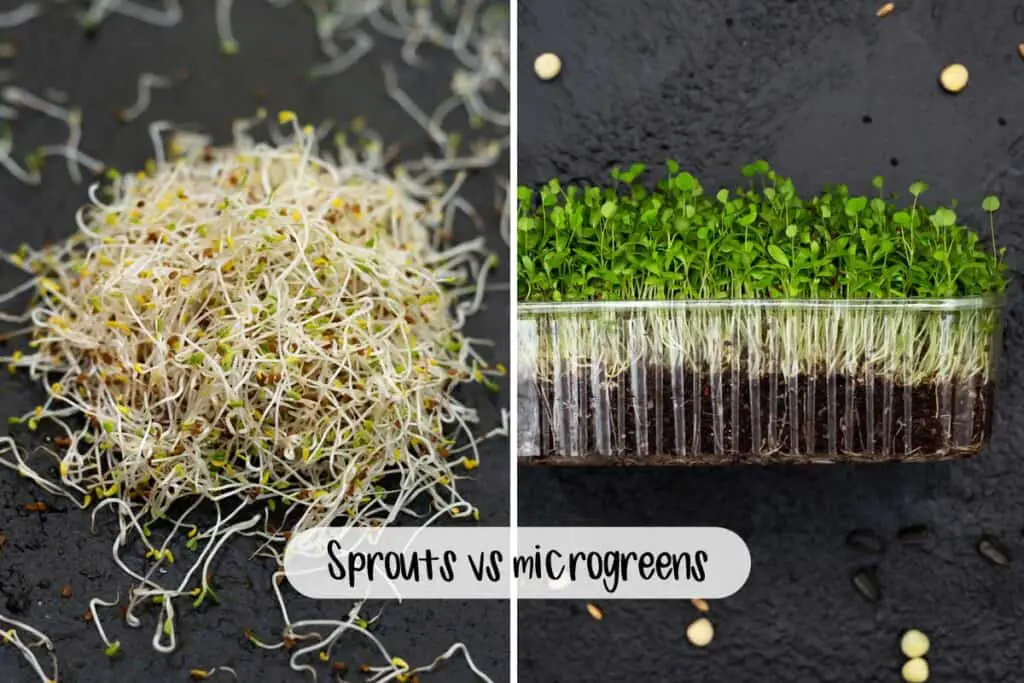
Sprouts and microgreens are both incredibly nutrient-dense foods, but even though they originate from the same type of seeds, there are differences.
Sprouts are seeds that have germinated and you eat them at an earlier stage of the growth cycle than microgreens. Sprouting is done in water (not soil), and they don’t need to be exposed to light. They are ready to be eaten after around 3-5 days. It’s when they develop stems, and some types will even grow small leaves.
Microgreens are seedlings that have been allowed to grow beyond the sprouting stage. They start as sprouts but continue to mature and grow taller until the true leaves appear. The growing time for microgreens varies depending on the type of seed, but on average, they are ready to be harvested after 10-14 days. At this time they have reached a height of about 2 inches.
Microgreens can be grown in water, soil, or other soilless mediums. They need darkness during the germination process (called the blackout period), and they require light to grow.
If you want to learn more about the difference, you can read our full article – Microgreens Vs. Sprouts: What’s the Difference?
Can you grow microgreens in any seed sprouter?
You can grow microgreens in a sprouter, but some are better suited than others.
A Sprouter is used to turn seeds into nutritious sprouts with minimal care and effort. They come in different models such as Sprouting trays, Sprouting jars and bags, Automated sprouters, and Multi-tier sprouting systems.
But not all of these types are fit for growing microgreens. The main reason for this is the size and dimensions. Microgreens grow vertically, so they cannot grow in closed systems, and they need space to thrive upwards.
Sprouting Trays can do the work, but what about Automatic Sprouters and Sprouting Jars, which is one of the more common sprouting tools?
- Sprouting Tray – Sprouting trays are commonly used by microgreen growers, even though their intended purpose is sprouting. They are great for growing microgreens and they come with a draining tray (also referred to as a mesh tray) that you will use to plant your seeds and a bottom tray to catch drained water. It’s an open system and microgreens can grow vertically without any problems.
- Sprouting Jar – Using sprouting jars is a simple but effective way to sprout seeds, but you cannot use them in the same way for growing microgreens. Using one is more for the fun of it. It won’t give you many microgreens, but it’s a great thing to do with kids! You can fill a jar with soil and use it as a container, or you can sprinkle some seeds on top of the mesh lid.
- Automatic Sprouters – Automated Sprouter takes the work out of the process and makes sprouts without any need for intervention. These machines run the end-to-end process including automated watering. We have researched various models and we have not yet found one that is ideal for growing microgreens. The reason is that the sprouting is done in closed containers with watering and drainage being done automatically. If you let the seeds continue to grow beyond sprouts it may cause overcrowding. And as you are growing the seeds in a closed container, you will not have the airflow needed and the watering is done from a sprinkler. All of these factors make an automated sprouter, in our opinion, not ideal for growing microgreens.
If you have tried and succeeded, we would love to hear your feedback! Share your story and comment in the section below the article!
How to Grow Microgreens in a Sprouter (Step-by-step Guide)
As we mentioned, there is a difference between sprouting and growing microgreens, and there are a couple of points you should consider before you go ahead.
- Optimize Lighting, Water, & Humidity – Make sure you have the right conditions at home to grow microgreens. They have a different need compared to sprouting. Regardless of what type of Sprouter you use, you need to give your microgreens enough light, water and control the humidity. We have an article that explains how to control humidity and temperature in microgreens.
- The mediums to use – You can use different types of medium when you grow microgreens. Sprouting is done in water, but when you grow microgreens, you can also use soil or a soilless medium such as coconut coir or hemp mats. Select the medium that works for the sprouter.
- Seed selection – Select the seeds of choice. Some easy microgreens to grow are Broccoli, Kohlrabi, Radish, and Mustard. If you use a mesh tray without a medium, select larger seeds such as peas or sunflower to ensure they don’t fall through the net.
If you need you need to buy seeds, read our guide on Where to Buy Microgreen Seeds. - How to Plant Your Seeds – This will depend on the type of Sprouter you use. In the following section of this post, we will go through the process for each of the different sprouters.
- Let It Grow – Microgreens take a longer time to grow than sprouts, and you will see the magic happen as you go through the stages of the growth process (planting, blackout, and light period).
- Harvesting – Sprouts are ready to be eaten after 3-4 days, whereas you harvest microgreens after about 10-14 days. It’s when they have reached about 1 ½ to 2 inches.
Here is a good article on How to Store Your Microgreens.
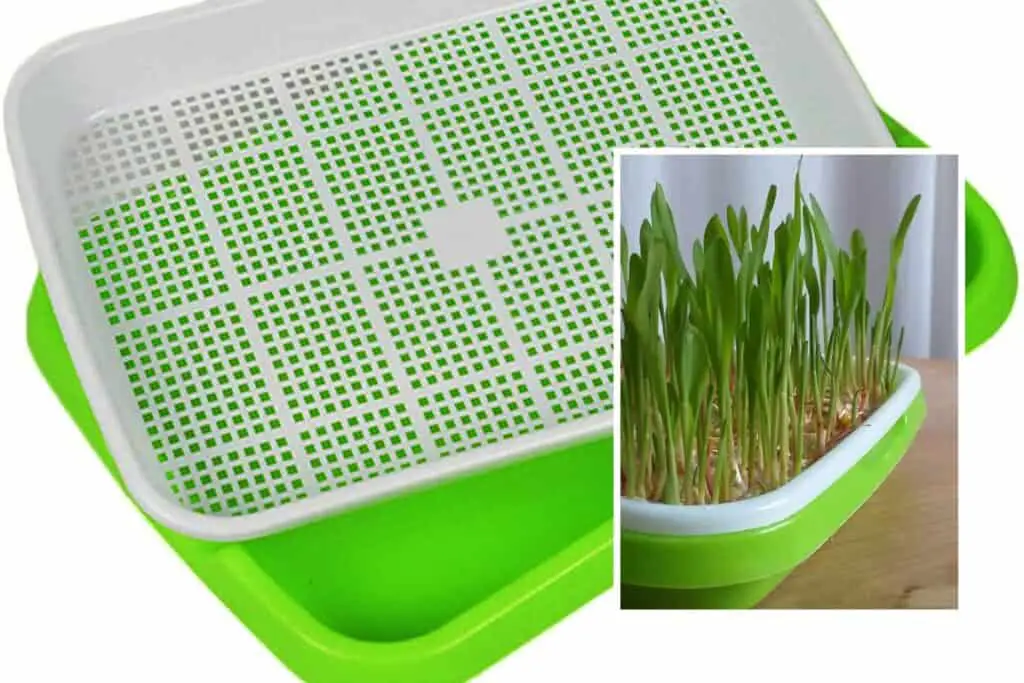
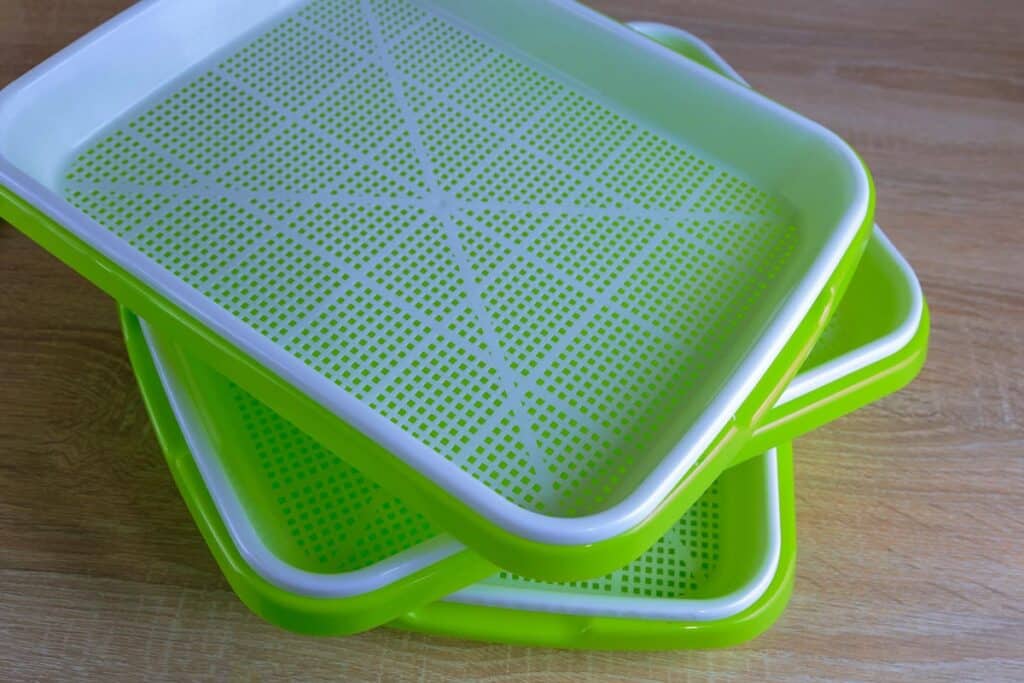
How to grow microgreens in a Sprouting Tray
Sprouting trays are great for growing microgreens as they are very similar to standard microgreens trays.
There are some differences though in how you use the Sprouting tray for sprouting seeds compared to growing microgreens.
When sprouting, you place the seeds directly on the mesh tray (or on top of another finer mesh screen to avoid seeds falling through). You water the seeds, drain them, and this is the repeated process until they have reached the sprouting stage.
When you grow microgreens, you leave your seeds to grow taller and use a growing medium that allows the roots to grow downwards through the net.
Sprouting trays are great for growing microgreens at home, due to their size. We are using both the standard 10/20’s microgreen trays and the smaller sprouting trays, but at times we think that the larger trays produce more than we need. So the smaller sprouting trays are perfect.
These trays are also excellent to use as they are not deeper than 2 inches, and that makes it easier when it is time to harvest.
What you need:
- A Sprouting Tray
- Soil, or another soilless medium such as hemp mat or coconut coir
- Seeds
- Tinfoil, table cloth, or another item to cover the tray
- Water spray bottle
- Knife or scissors
Here is how you use it:
- Soak the seeds – If you are growing larger-sized seeds, such as peas or sunflower, they benefit from being pre-soaked. This will help them to germinate better. Place the seeds in a jar filled with water for about 6-12 hours. Drain the seeds before you plant them. Smaller seeds such as broccoli, kale, or radish don’t need to be pre-soaked. It depends on the type, so always check the instructions on the seed bag.
- Prepare the medium & seeds – Bring out your sprouting tray and fill it up with a growing medium. You can grow microgreens using only water, but we prefer using potting soil or coconut coir as it helps the seeds to stay in place and for the roots to get a good grip and grow downwards through the net. Alternatively, you can also use a hemp mat, or any other soilless grow medium. Flatten out loose medium with your hands. Sprinkle your seeds evenly across the tray. Be careful not to grow with too much density. That can cause problems with the growth such as mold or wilting. For a Sprouter Tray, you can use approximately 10-15 grams of seeds. Once you have planted your seeds, give them a good mist of water. You want the medium to be moist but not soaked. Be careful not to wash the seeds away.
- Blackout – When you have prepared the tray and planted the seeds, it’s time for the blackout. It will support the germination as it mimics the seeds being planted in the ground. Cover the tray either with the bottom tray, or use a piece of tin soil, a paper towel, or a cloth. If you want to use the bottom tray as a cover, remember to put the tray somewhere it won’t damage the surface. When you water your seeds, water may leak through the net, and some soil may be falling through. Leave your tray in the dark for a couple of days. The exact duration of the blackout varies depending on the seeds you grow.
- Weight – Some seeds benefit from getting weight on top. If you are using the bottom tray or any other hardcover, you can put some weight (around 7lb) on the top cover during the blackout period. You can use a stone or other heavy material. It helps to press the seeds into the growing medium and keeping them moist. It also makes them grow stronger as they push upwards, and it can help to remove seed hulls.
- Watering – During the blackout period, water the seeds in the morning and night with a light misting. Spray them gently during the germination process. Again, be careful not to wash the seeds away.
- Sunlight – When you see that the seeds have germinated and the microgreens have started to grow, it is time to introduce them to light. Remove the cover and place the tray where the microgreens can get sunlight or under a grow light. Provide them a minimum of 6-8 hours of light per day. The more ideal is to provide them around 12-15 hours per day and keep them in the dark from 9-12 hours. During the growth stage, you can stop giving them water from the top (misting). Instead, fill up the bottom tray with water. It’s called bottom-up watering. Pour about a 1/2 cup of water per day in the tray. You must check that roots soak up the water. NOTE! There is a gap between the mesh tray and the bottom tray, so always check that the roots reach the water!
- Harvest – Your microgreens are ready for harvest at around 2 inches of visible growth above the surface (or emerged from your seedling if you are not using soil). Simply snip the amount you want using clean scissors or a sharp knife.
- Enjoy! – Eat promptly after harvesting as this is their peak time of freshness. Enjoy!
TIP: After you have finished your growth, always make sure to clean and sanitize your trays. It will prevent your next crop from going bad. If you leave any debris, it can grow mold and leaves spores behind. Read the article How to Sanitize Microgreen Trays to learn more about the importance of cleaning and how you can easily do it.
How to grow microgreens in Sprouting Jar
Using a jar is a simple way to turn seeds into sprouts but not as beneficial for growing microgreens. You can do it, but it’s more for the fun of it as it doesn’t give you much volume! It’s a fun project to do with kids. Let them take care of their own little jar and watch the seeds turn into magical greens!
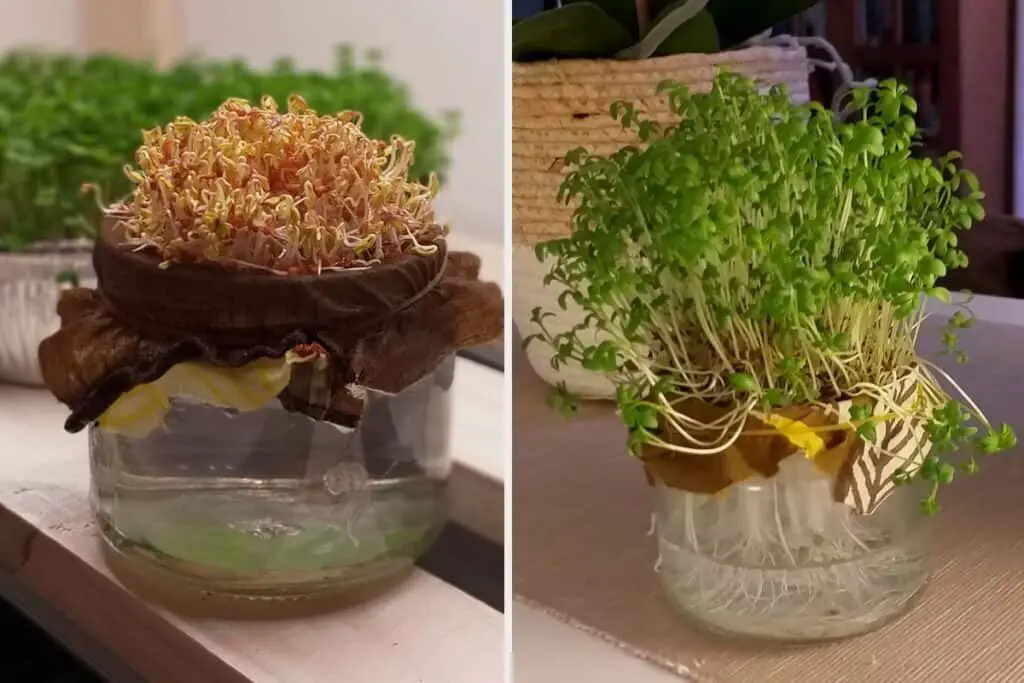
You’ll need nothing but the seeds, the jar itself, and a mesh lid (or a piece of a table cloth and a rubber band). That’s it, believe it or not!
We will use a different method than if you solely sprout the seeds. When sprouting, you place them inside a jar filled with water, drain the seeds and rinse them, then drain again and see the magic happen. Growing microgreens, we will do it differently and place the seeds on top of the lid.
What you need:
- A mason jar with a mesh lid
- Table cloth and rubber band, if mesh lid is not used
- Water (fertilizer is optional)
- Seeds
- Water spray bottle
- Knife or pair of scissors
Here is how you use it:
- Soak the seeds – If you are growing larger-sized seeds, such as peas or sunflower, they benefit from being pre-soaked. Do it for 6-12 hours before. Smaller seeds such as broccoli, kale, or radish don’t need to be pre-soaked. The need for soaking depends on the type, so always check before.
- Select a right-sized jar – Select a wide-mouth mason jar with a mesh lid. You can also make the lid yourself by cutting a screen material to the same size as the lid and pinch holes in it. You use the lid as your “tray” to sow the seeds. Or put a table cloth around the top of the jar and add a rubber band around to keep it in place.
- Fill up with water – Fill up the jar with water so it nearly reaches the top. The water is being absorbed by the roots as they grow downwards the jar. You will be using water as your growing medium, and it will be enough for the seeds to grow.
- Plant the seeds – As you have the setup ready, it is time to sprinkle seeds. Take about a half teaspoon full of smaller size seeds and spread them evenly across the mesh lid. The volume depends on the size of the seeds. You want them to distribute evenly across the entire surface. Be mindful not to place too many so they end up on top of each other.
- Water & Blackout – Even though you are filling the jar with water, you need to start by giving the seeds a mist of water. Spray the seeds and cover them with the lid from the jar. If you don’t have one, you can also use tin foil or a piece of cloth. Put the jar in a dark place for 3-4 days. This first phase of growth is called the blackout phase. During these first couple of days, the seeds will germinate and start to grow roots. Continue watering the seeds twice a day (morning & evening) by giving them a gentle mist. Keep them in the dark until they have germinated and roots are starting to grow downwards the jar.
- Sunlight – When you see that the seeds have germinated, it is time to introduce them to light. Remove the cover and place the jar where the microgreens can get sunlight or under a grow light. Provide them a minimum of 6 hours of light per day. The more ideal is to provide them around 12-15 hours per day and keep them in the dark from 9-12 hours. During this growth stage, you can stop giving them water from the top (misting) and instead ensure that the jar is always filled with water. That way the roots are constantly wet.
- Harvest – After another 5-7 days, most microgreens have reached their ideal length (about 2 inches), and it is time to harvest. Take a sharp knife or a pair of scissors and cut the microgreens close to the lid mesh. Put the remaining roots in your compost.
- Enjoy! – Congratulations, you have grown microgreens in a glass jar, and you can now enjoy these tasty and nutritious greens!
Best Sprouters Available for Purchase
If you want to use the same equipment for sprouting and growing microgreens, then you should invest in a sprouter that can make it work.
We have been researching what great sprouters are available in the market. Some models that come highly rated are:
Sheing Seed Sprouter Tray
This green and white sprouting tray is excellent for growing microgreens. They are made of sturdy BPA-free plastic and will last you long.
The upper tray comes with a net that holds the seeds and allows the roots to grow downwards the bottom tray. This supplier is so confident you will enjoy their product that they offer a 30-day, 100% guarantee!
We use these trays ourselves and love them!
You can buy the Sheing Sprouter Trays on Amazon.
Stainless Steel Seed Sprouting Tray
The sprouter is made of stainless steel with a fine mesh stainless steel screen on the bottom, and it is ideal for growing microgreens. It has a solution that makes it very easy to harvest.
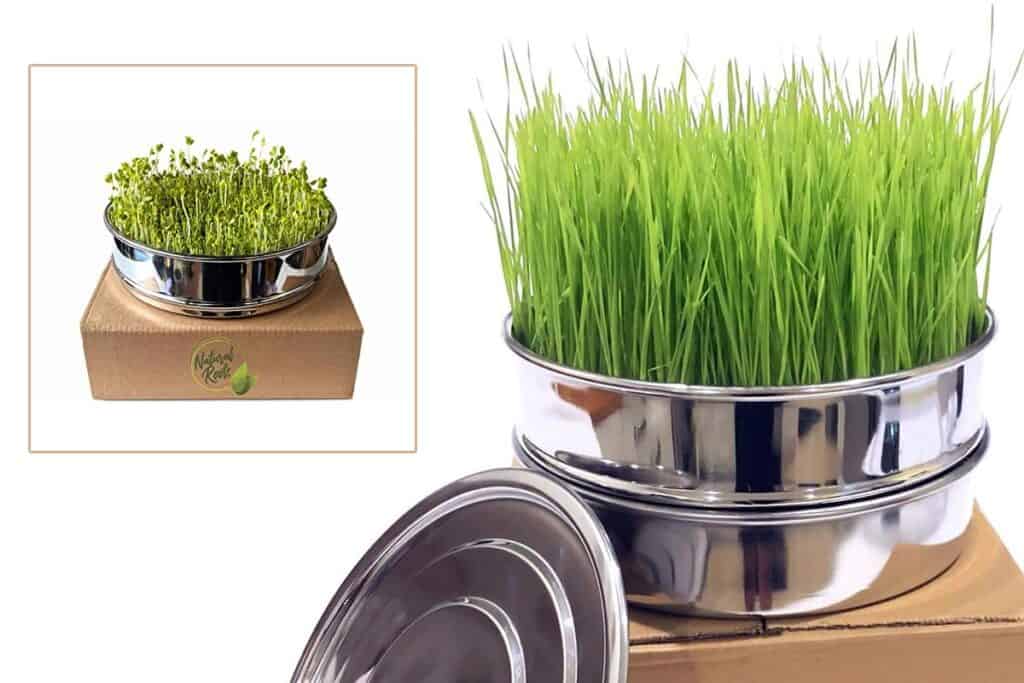
It has a diameter of 9 inches and is 2,9 inches tall. If you are using a medium you can let your microgreens grow beyond this height as there is no lid.
You can buy the Stainless Steel Sprouting Trays on Amazon.
Euro Tray Sprouter
If you want to grow microgreens with style then this is your sprouter! These small trays are triangular and made of ceramic. You can combine several of them to make a beautiful setting!
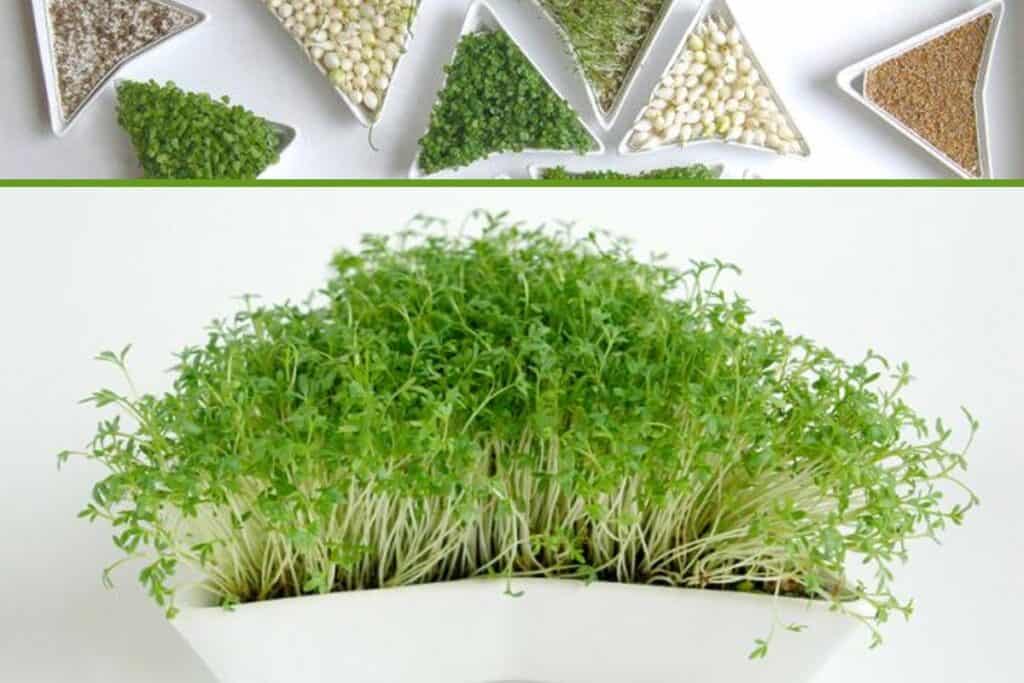
The bases measure 6 inches on each side and it is 1.75 inches deep. They come with a container, a strainer that works as a mesh, and a cover.
The supplier claims the sprouter can be used for most microgreens with the exception of Beet, Celery, Cilantro, or Dill microgreens, so ensure to check instructions before you plant your seeds!
You can buy the Euro Tray Sprouter here.
Final Tips for Growing Microgreens in A Sprouter
The microgreens’ growing process is simple, but some things can make you fail or be successful.
A few final tips as you enter your new chapter of having a green thumb are:
- The kitchen is the most common place to leave your sprouter but be mindful of the direct sunlight. Some seeds need the full 16-hours per day, while others thrive in a darker and cooler environment removed from heat. The plant you are working with will dictate this greatly. Follow the directions on your specific seedling, and don’t expect it to be one-size-fits-all.
- Check that your jars, trays, containers, and all products that you are using – are clean.
- Disinfect and properly clean each tool before growing your food in it. Always reference your sprouter-specific instructions for how to take care of your equipment.
- Keep a clean working space throughout the process.
- Also, be sure that you are purchasing your seeds from a reputable distributor or local farmer. We have created a comprehensive list of suppliers you can check out.
Let’s wrap it up!
We hope you have found this article interesting and that it has sparked an interest in growing microgreens in your sprouter. The great thing is that you do both sprouts and microgreens using the same equipment.
We love to grow microgreens in our Sprouter tray and it has given us great results. We have also made fun projects using the Sprouting Jars!
Happy Growing!